TEA BOWL TESTING
Since graduating from my undergraduate studies in 2018 I have been developing a set of slips and glazes that fulfill my aesthetic aspirations. Over the last three years and after many rounds of testing and tweaking, I have arrived at a library of surfaces which I have documented in the form of miniature tea bowls. What follows documents the material library I have created, discussing the particulars of each tea bowl along with my general method and some of the thinking behind my decision making. Head straight to the bottom for recipes and more images, and feel free to get in touch with any questions.
The LIBRARY
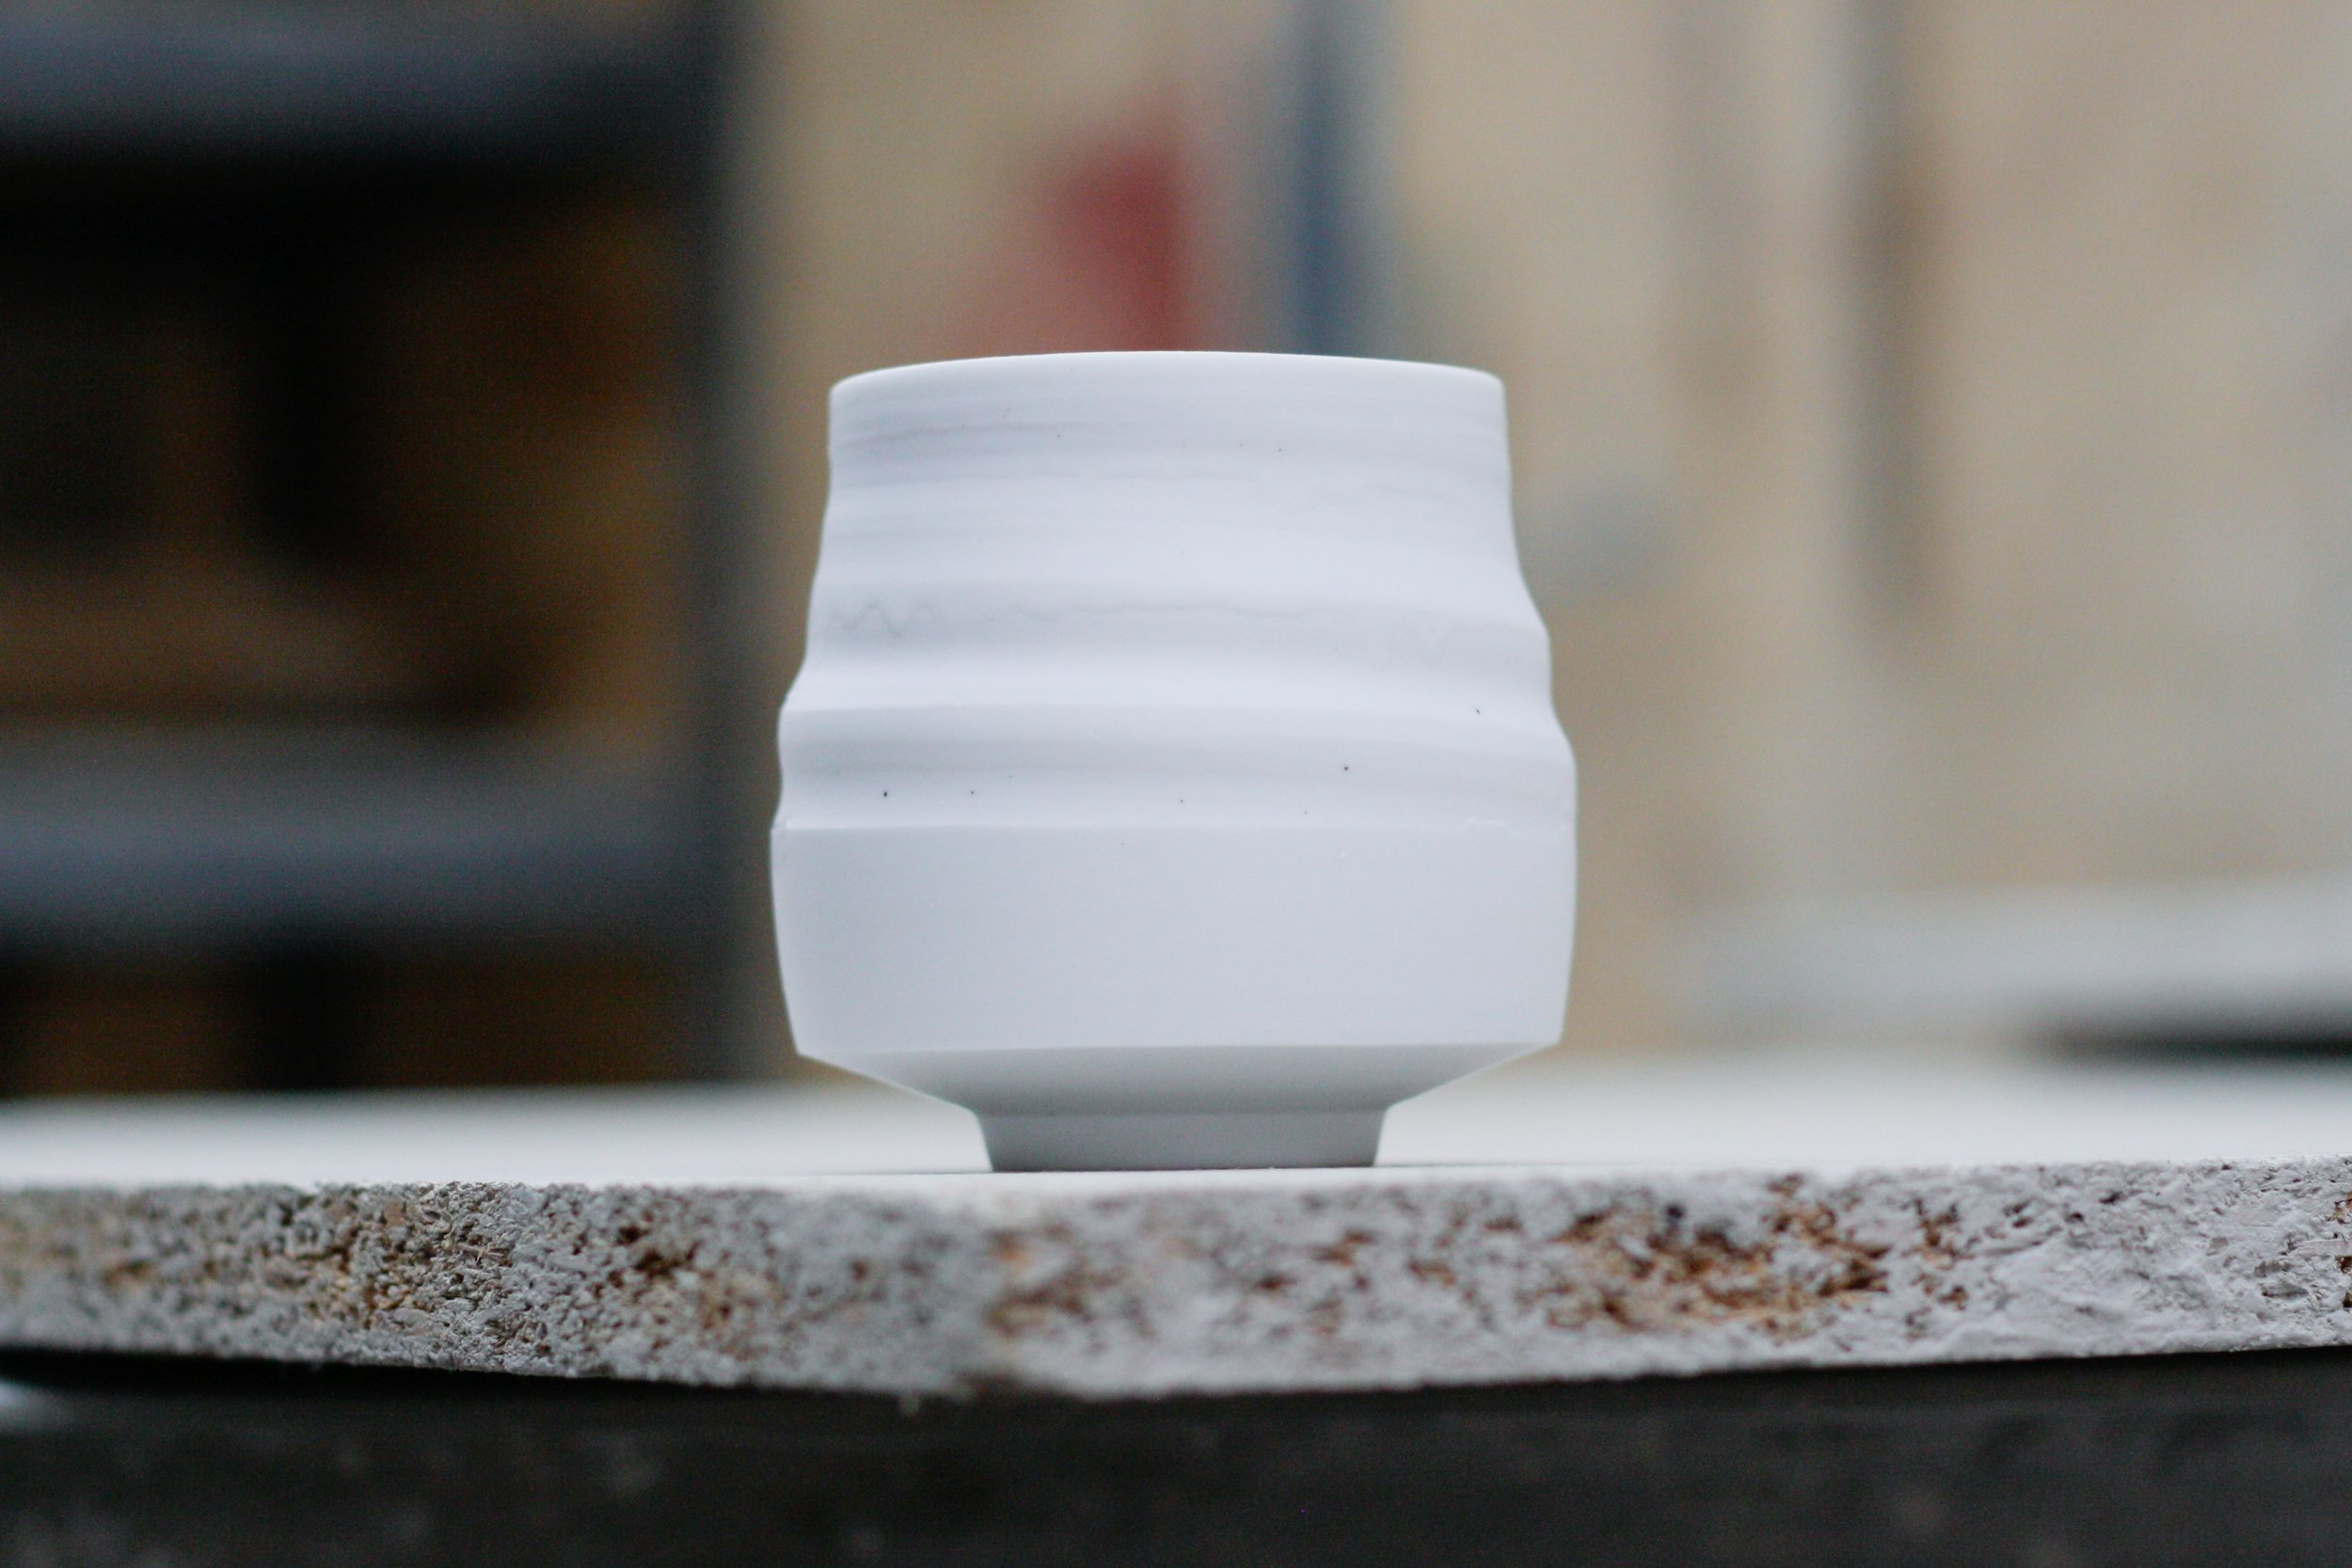
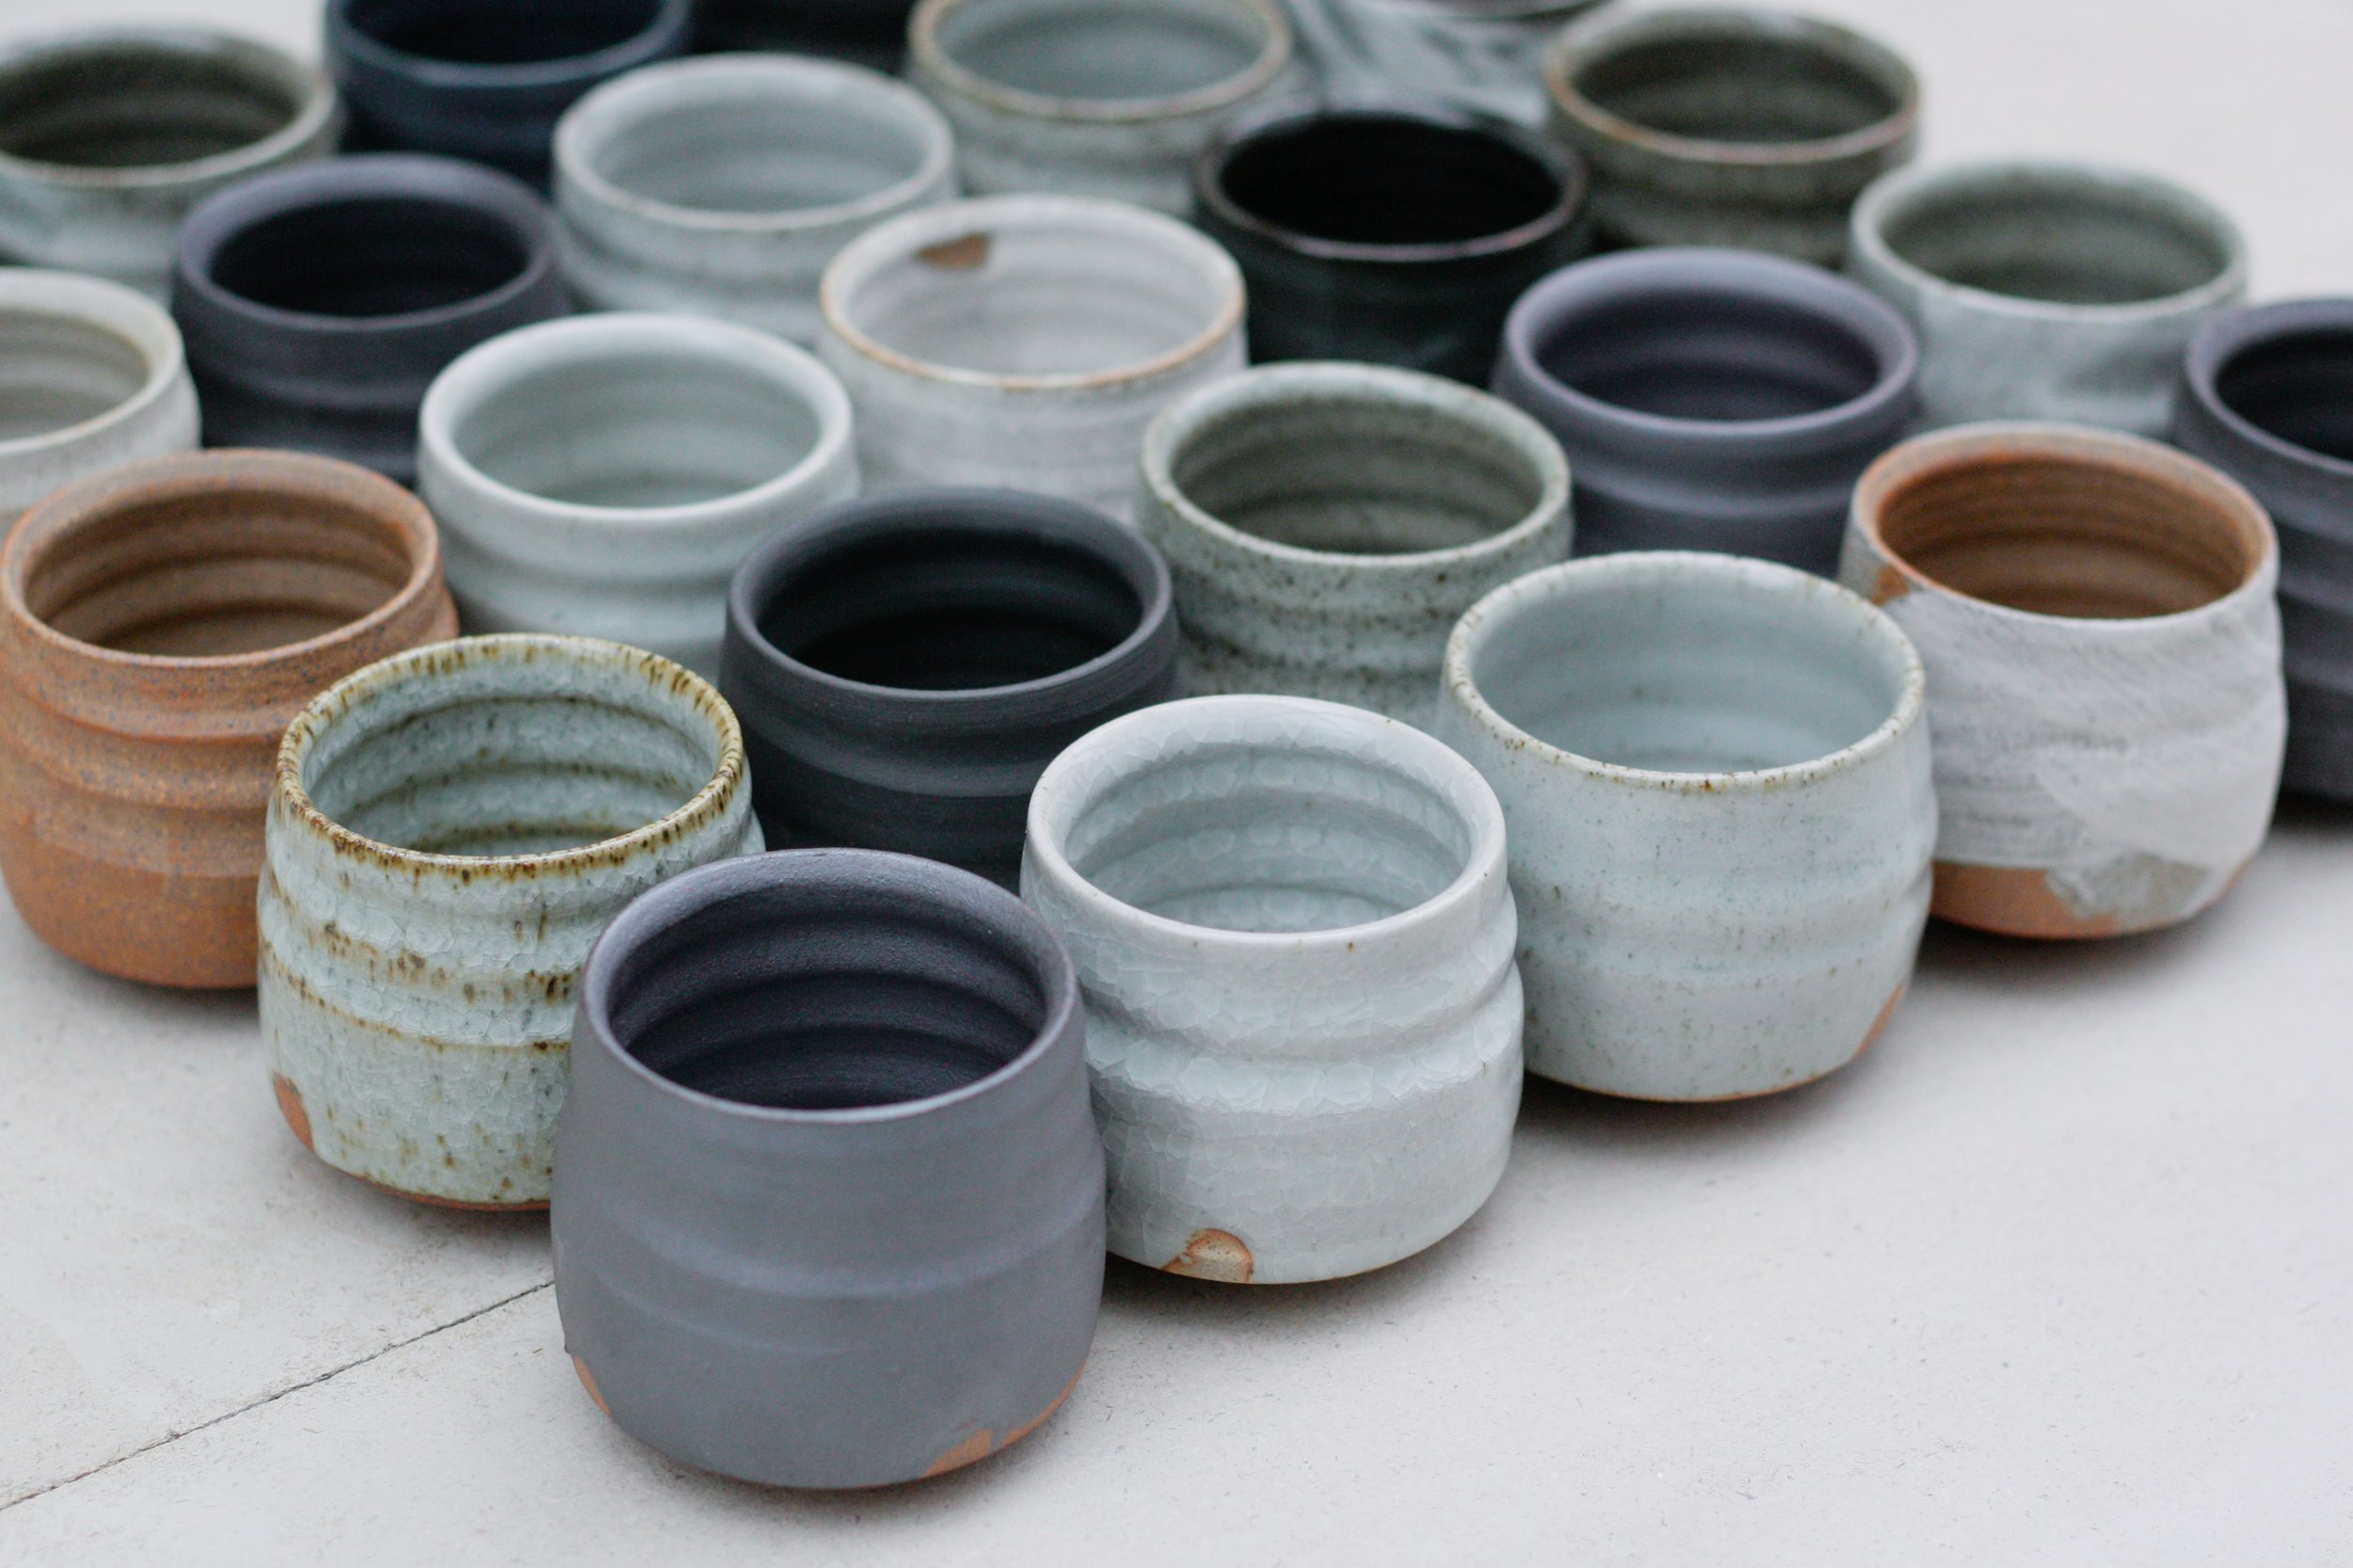
The following images are of the finalised slips and glazes that make up my material technology library, consisting of several clay bodies, several slips and several glazes in various combinations (that will be outlined in more detail below). I have tried to achieve a balance of contrast and cohesion that allows for depth and tension without straying too far from the calm, natural feel that I look to create with my work. While this final round of testing yielded more than just these results, the pots below represent the resolved finishes that are ready to be implemented in my practice. Each finish is breifly described in the caption beneath it. It is crucial to note that all of these results are achieved in a gas kiln through the process of reduction firing.
Buff stoneware, unglazed: reduction fired to 1290 degrees C
Buff stoneware with brushed white slip and clear glaze: reduction fired to 1290 degrees C
Grey stoneware with black stain slip and clear glaze: reduction fired to 1290 degrees C
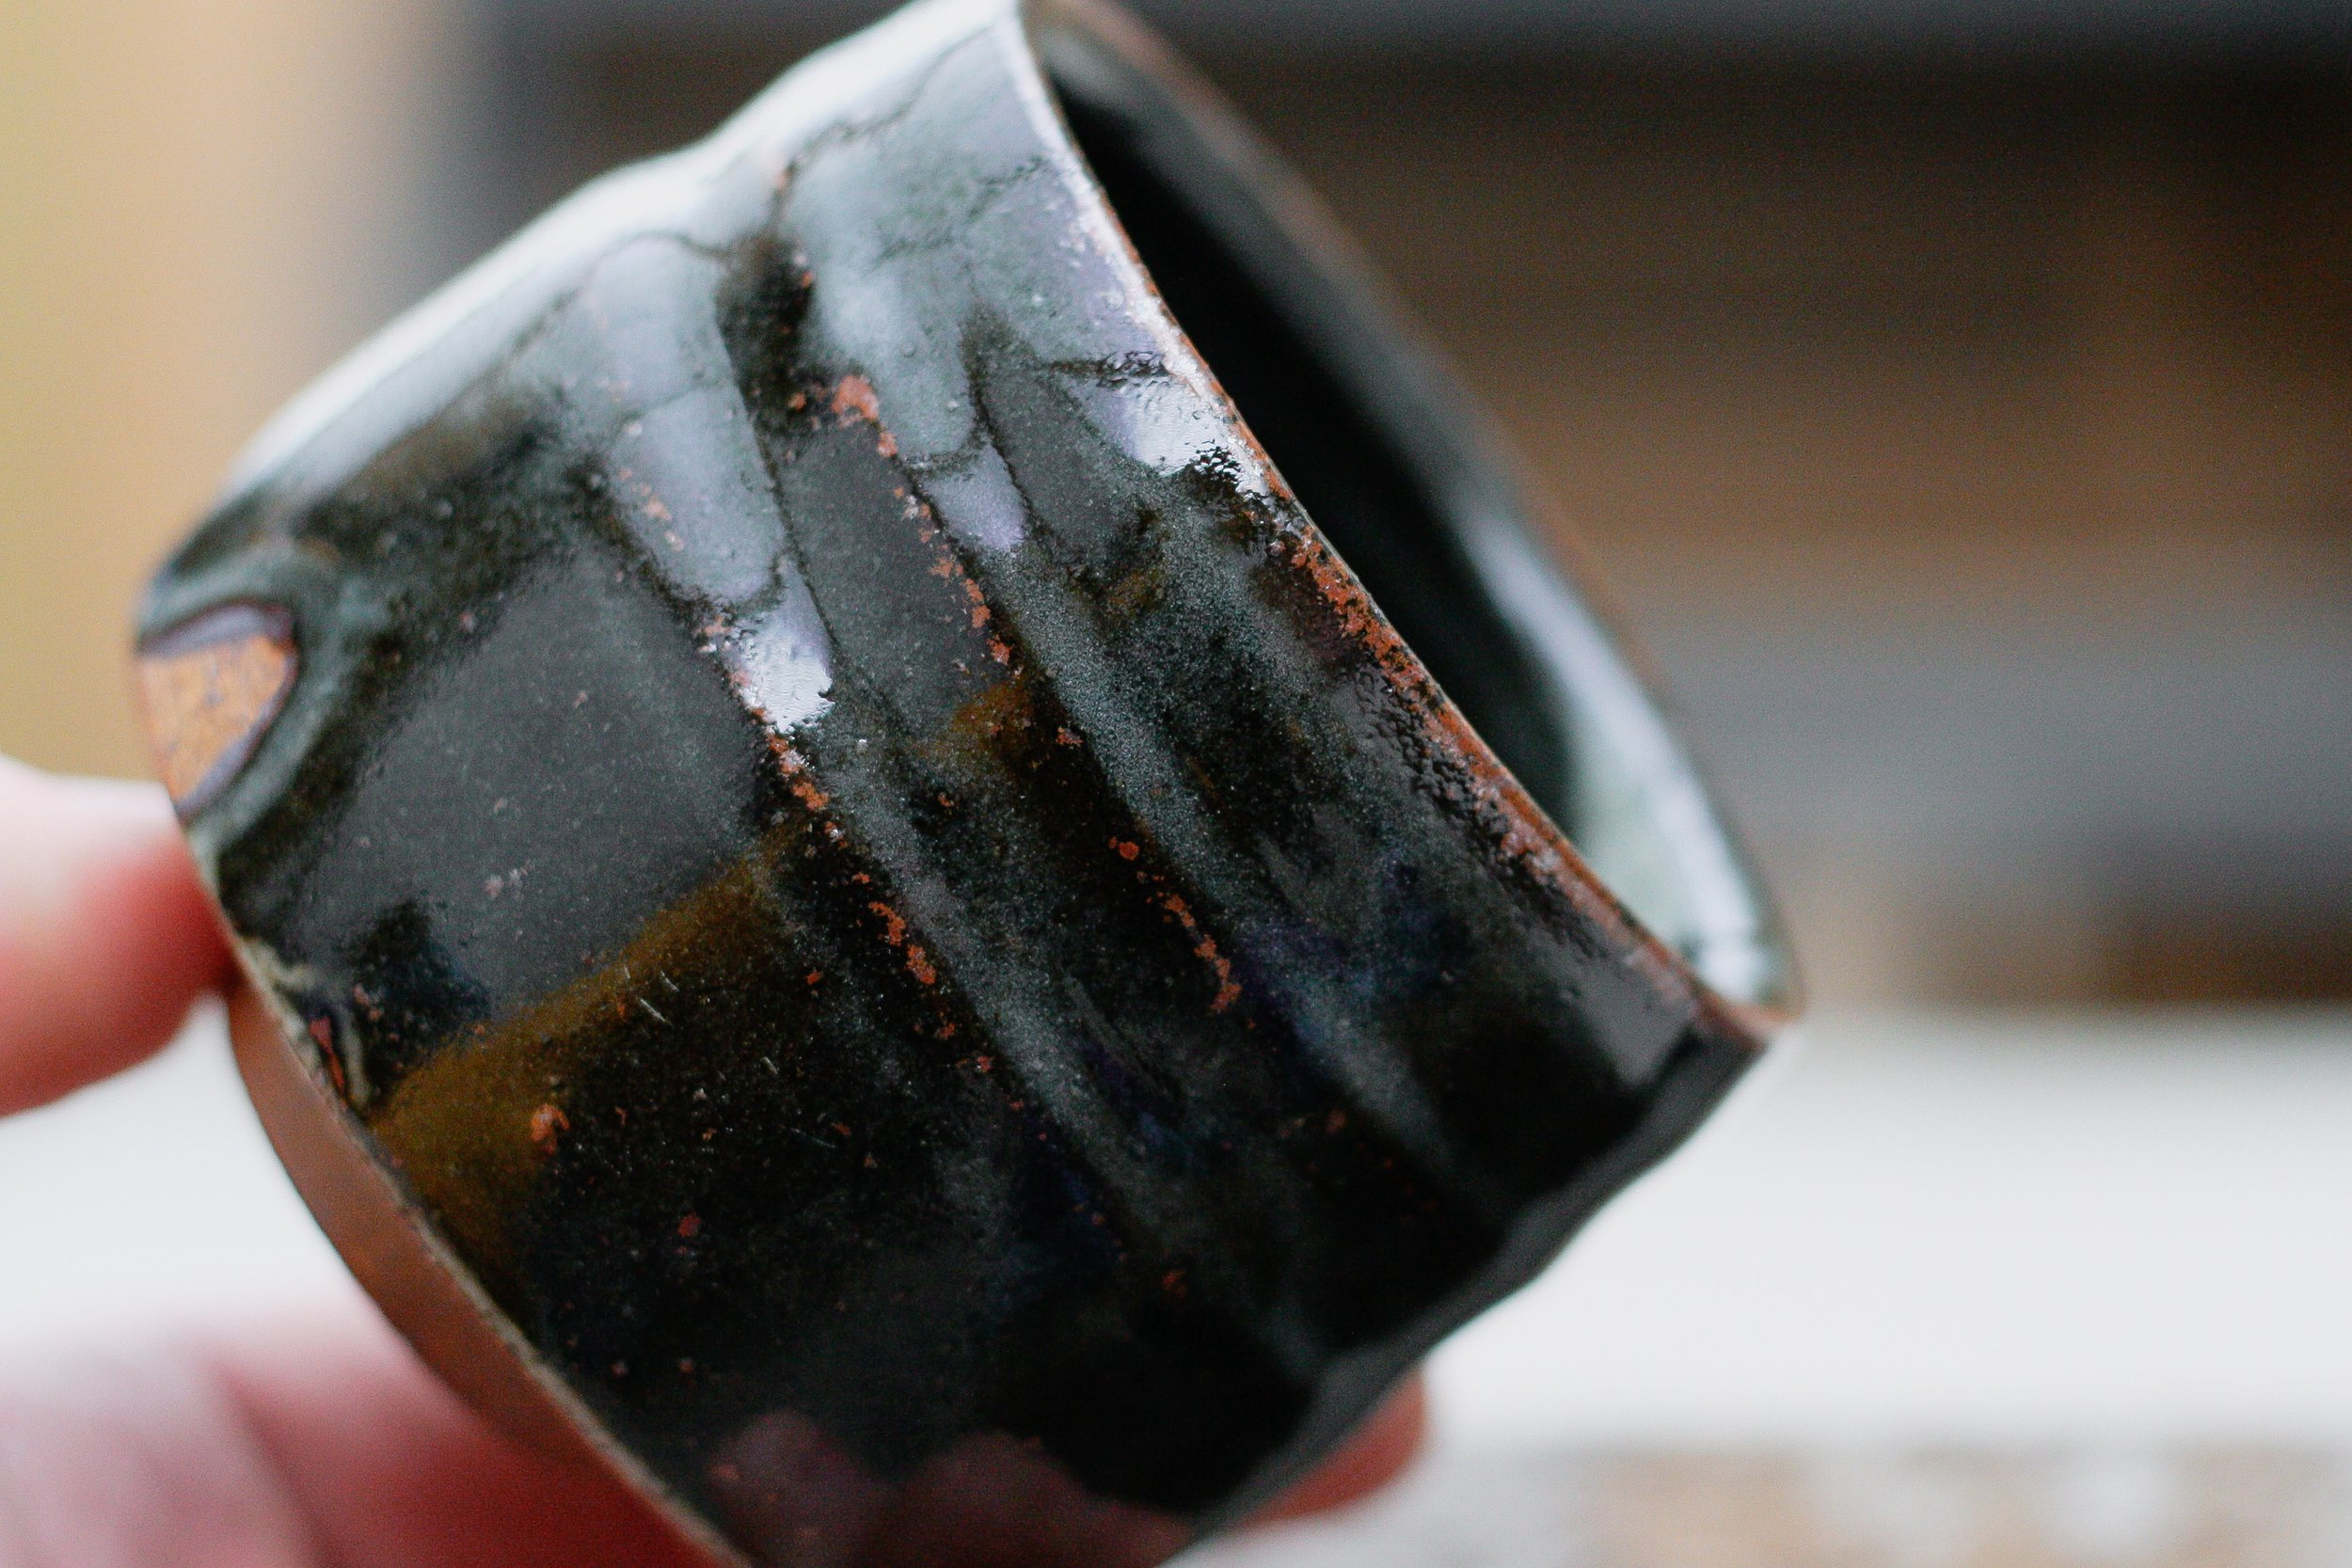
Buff stoneware with dipped iron slip and clear glaze: reduction fired to 1290 degrees C
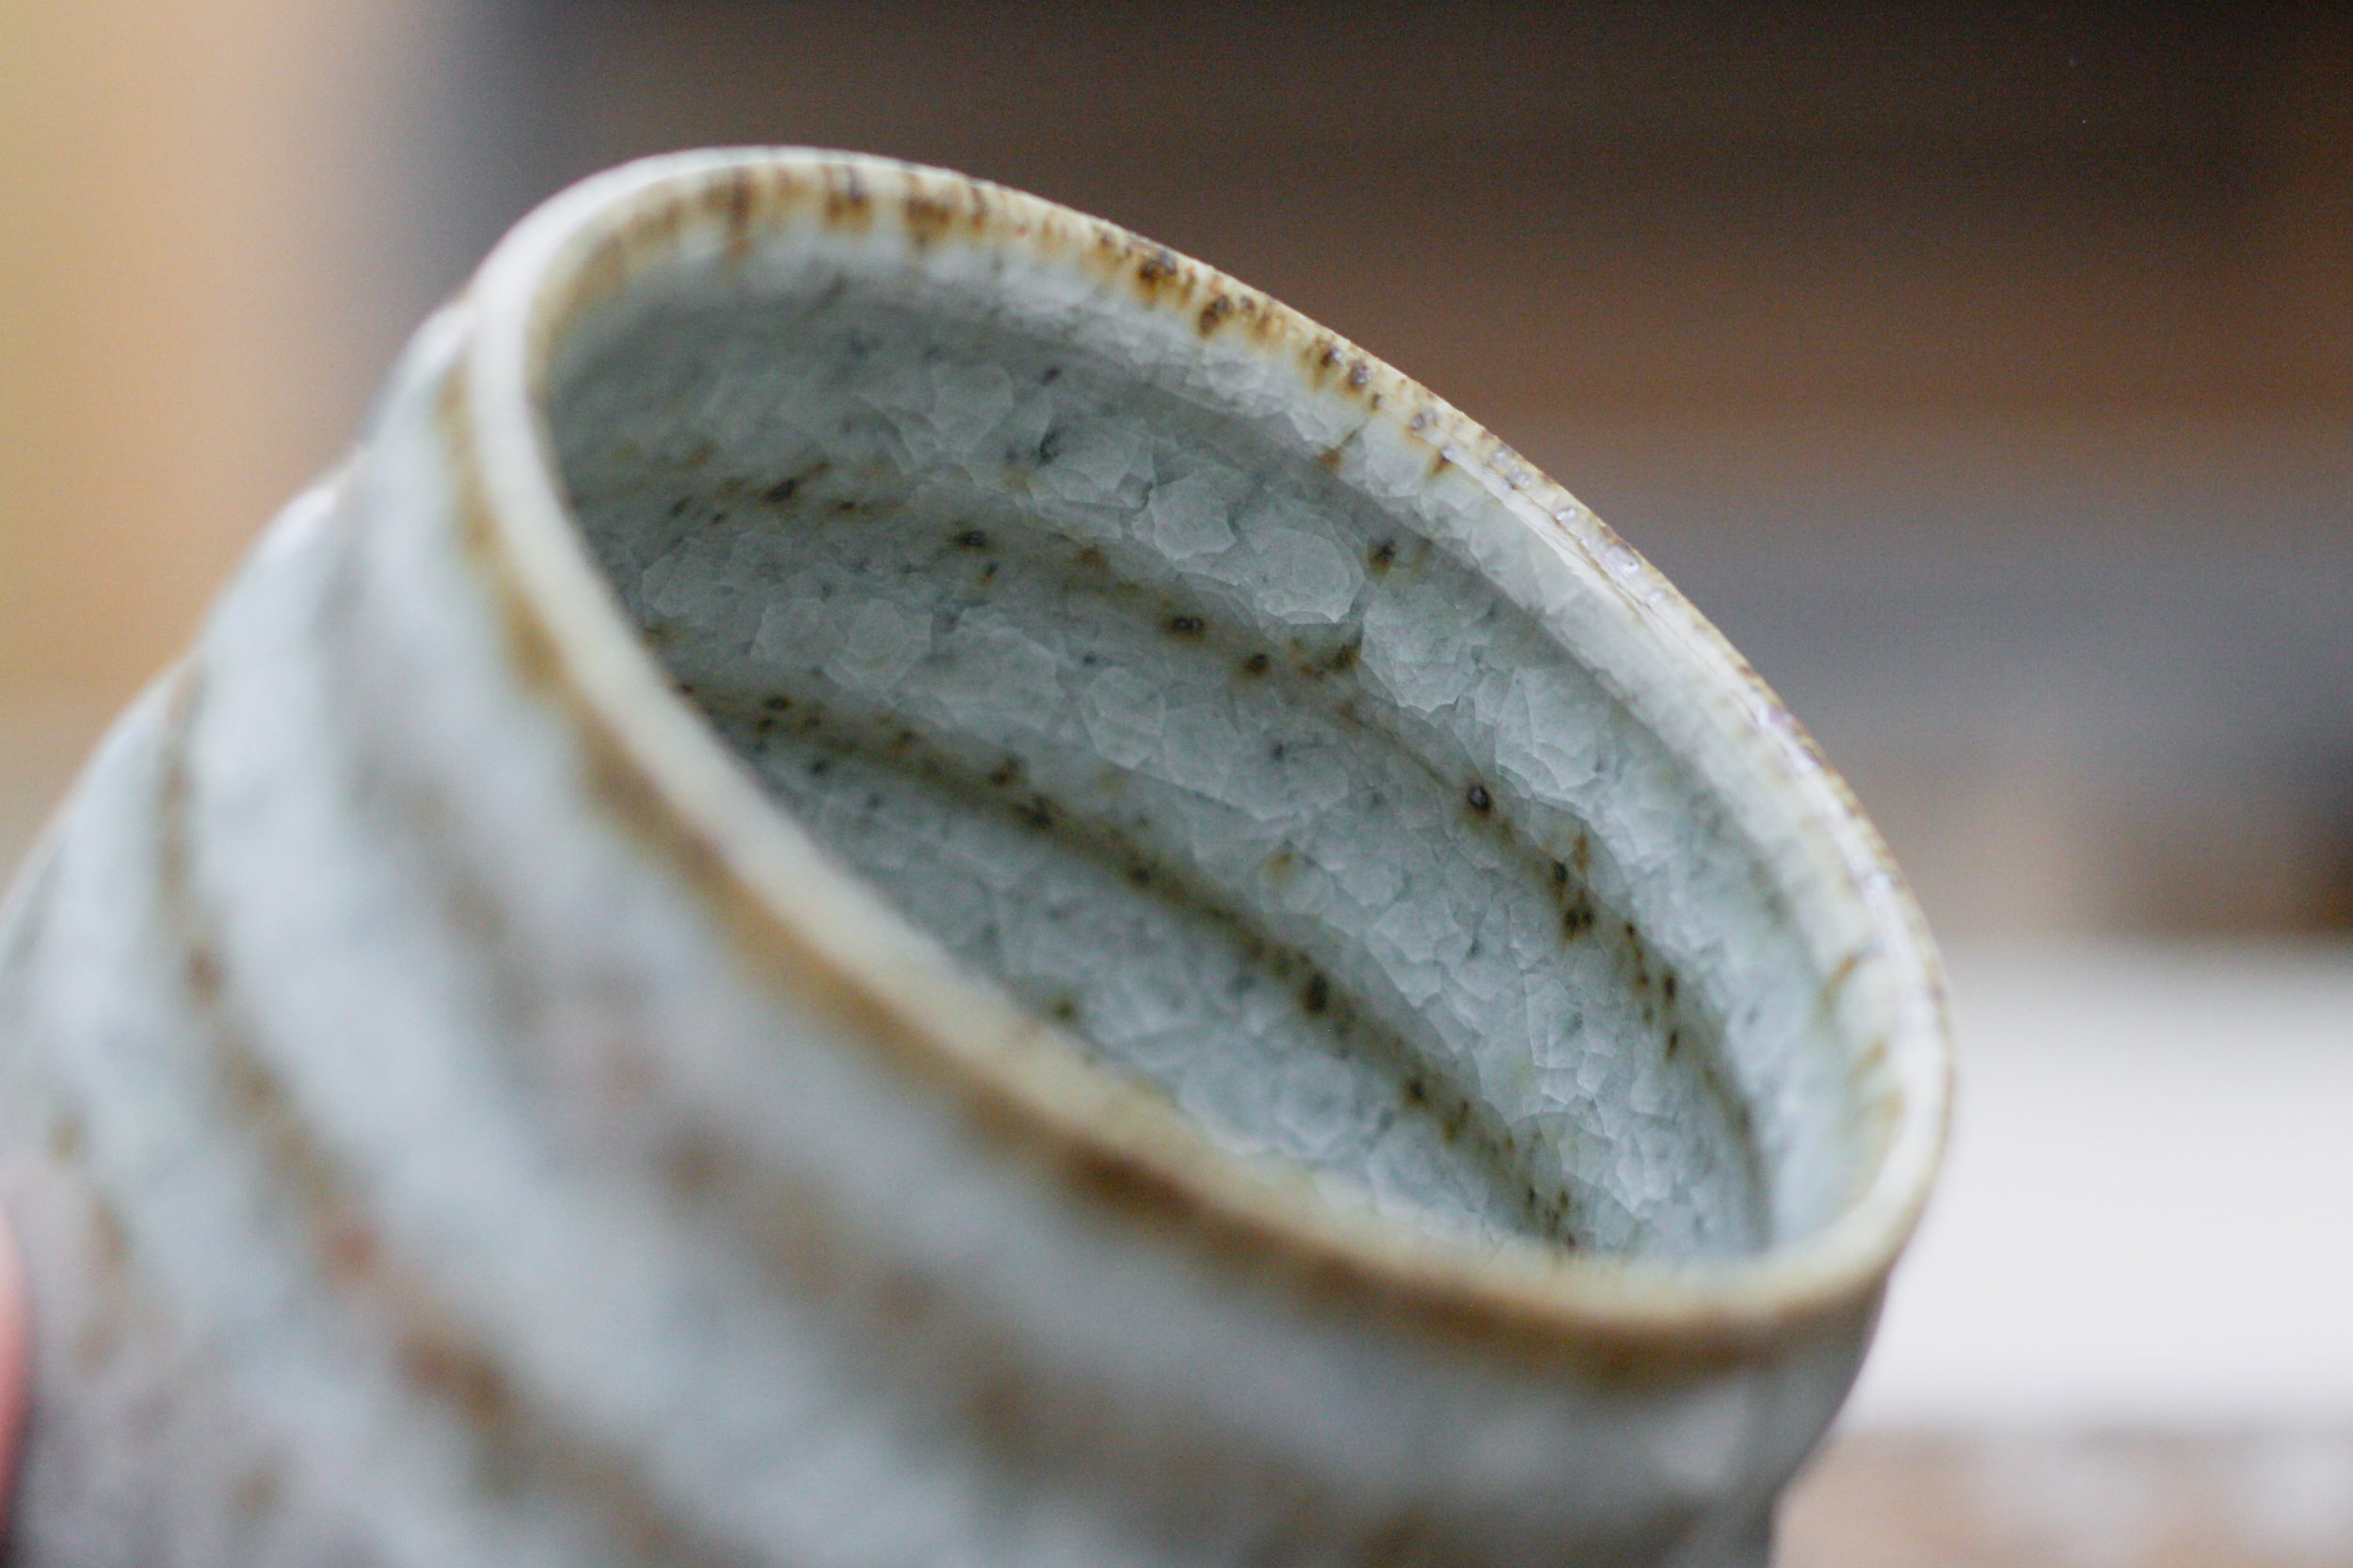
Buff stoneware with nephelene syenite crackle: reduction fired to 1290 degrees C
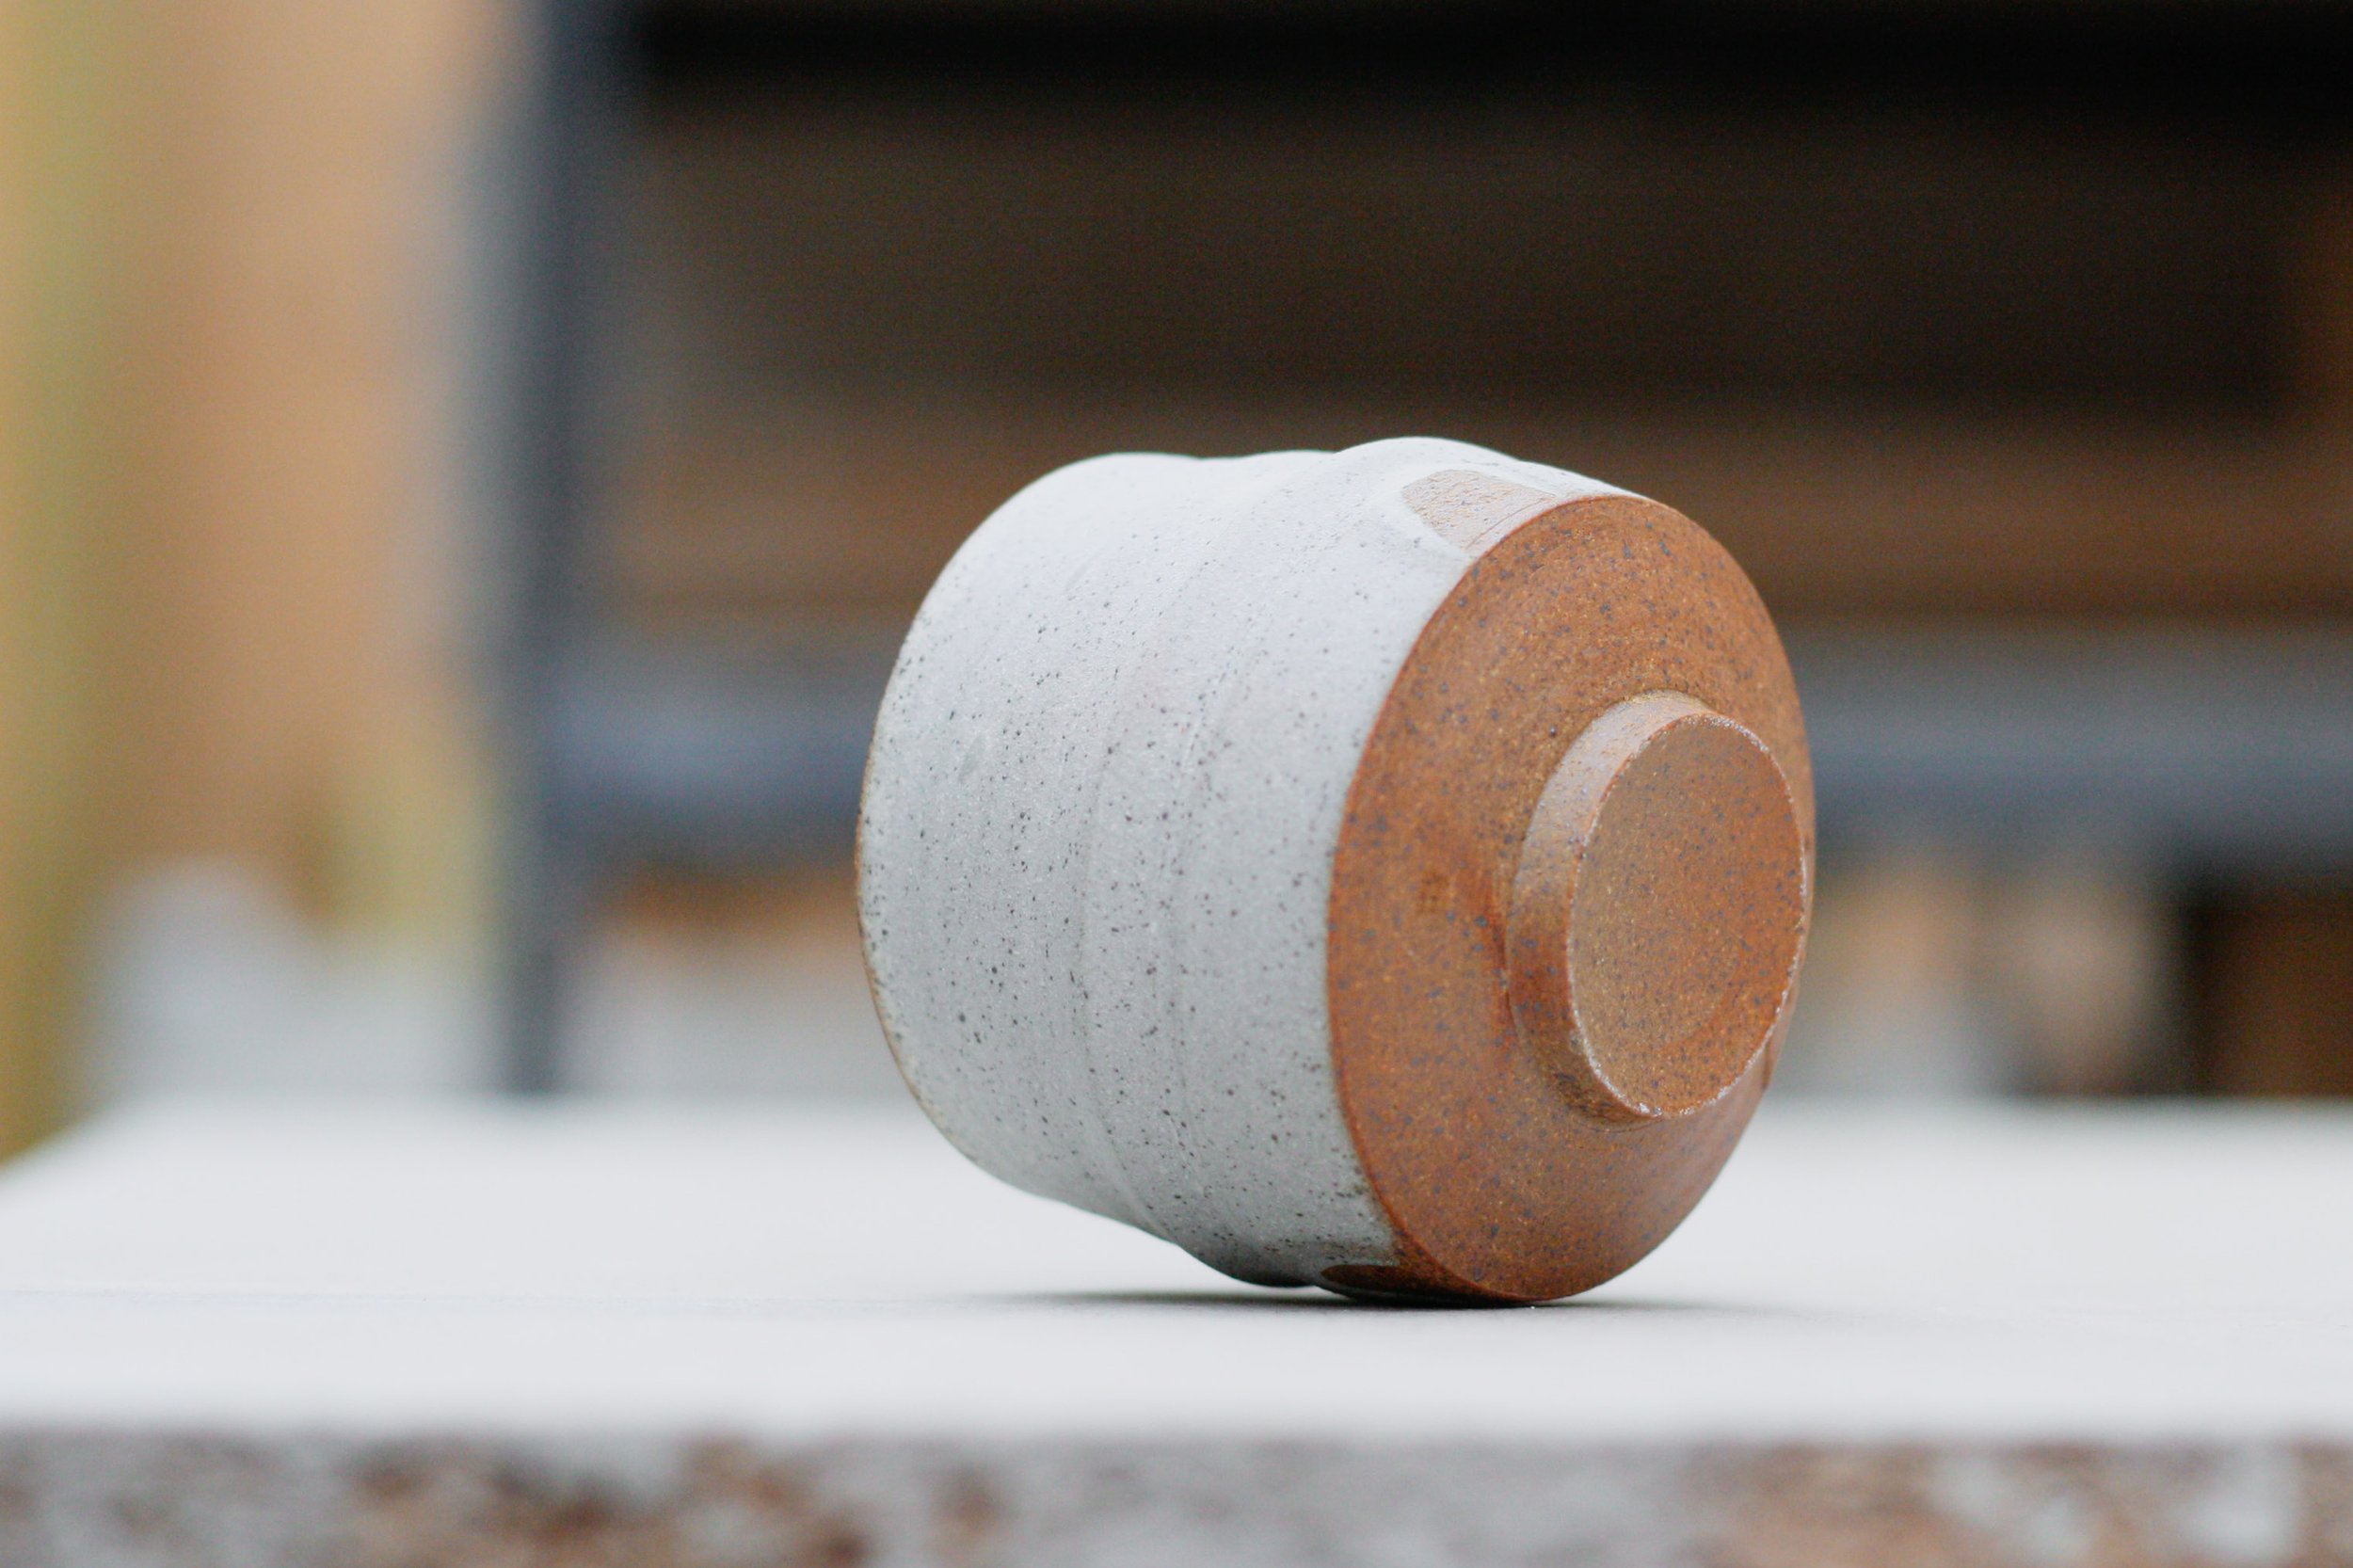
Buff stoneware with dipped white slip, unglazed: reduction fired to 1290 degrees C
Buff stoneware with dipped white slip and celadon type glaze: reduction fired to 1290 degrees C
Grey stoneware with dipped iron slip, unglazed: reduction fired to 1290 degrees C
Grey stoneware, unglazed: reduction fired to 1290 degrees C
Black stoneware blend, unglazed: reduction fired to 1280 degrees C
Buff stoneware with brushed white slip, unglazed: reduction fired to 1290 degrees C
Buff stoneware with celadon type glaze: reduction fired to 1290 degrees C
Grey stoneware with dipped iron slip and clear glaze: reduction fired to 1290 degrees C
Grey stoneware with clear glaze: reduction fired to 1290 degrees C
Grey stoneware with black oxide slip, unglazed: reduction fired to 1290 degrees C
Buff stoneware with clear glaze: reduction fired to 1290 degrees C
Grey stoneware with dipped black stain slip, unglazed: reduction fired to 1290 degrees C
Buff stoneware with dipped iron slip, unglazed: reduction fired to 1290 degrees C
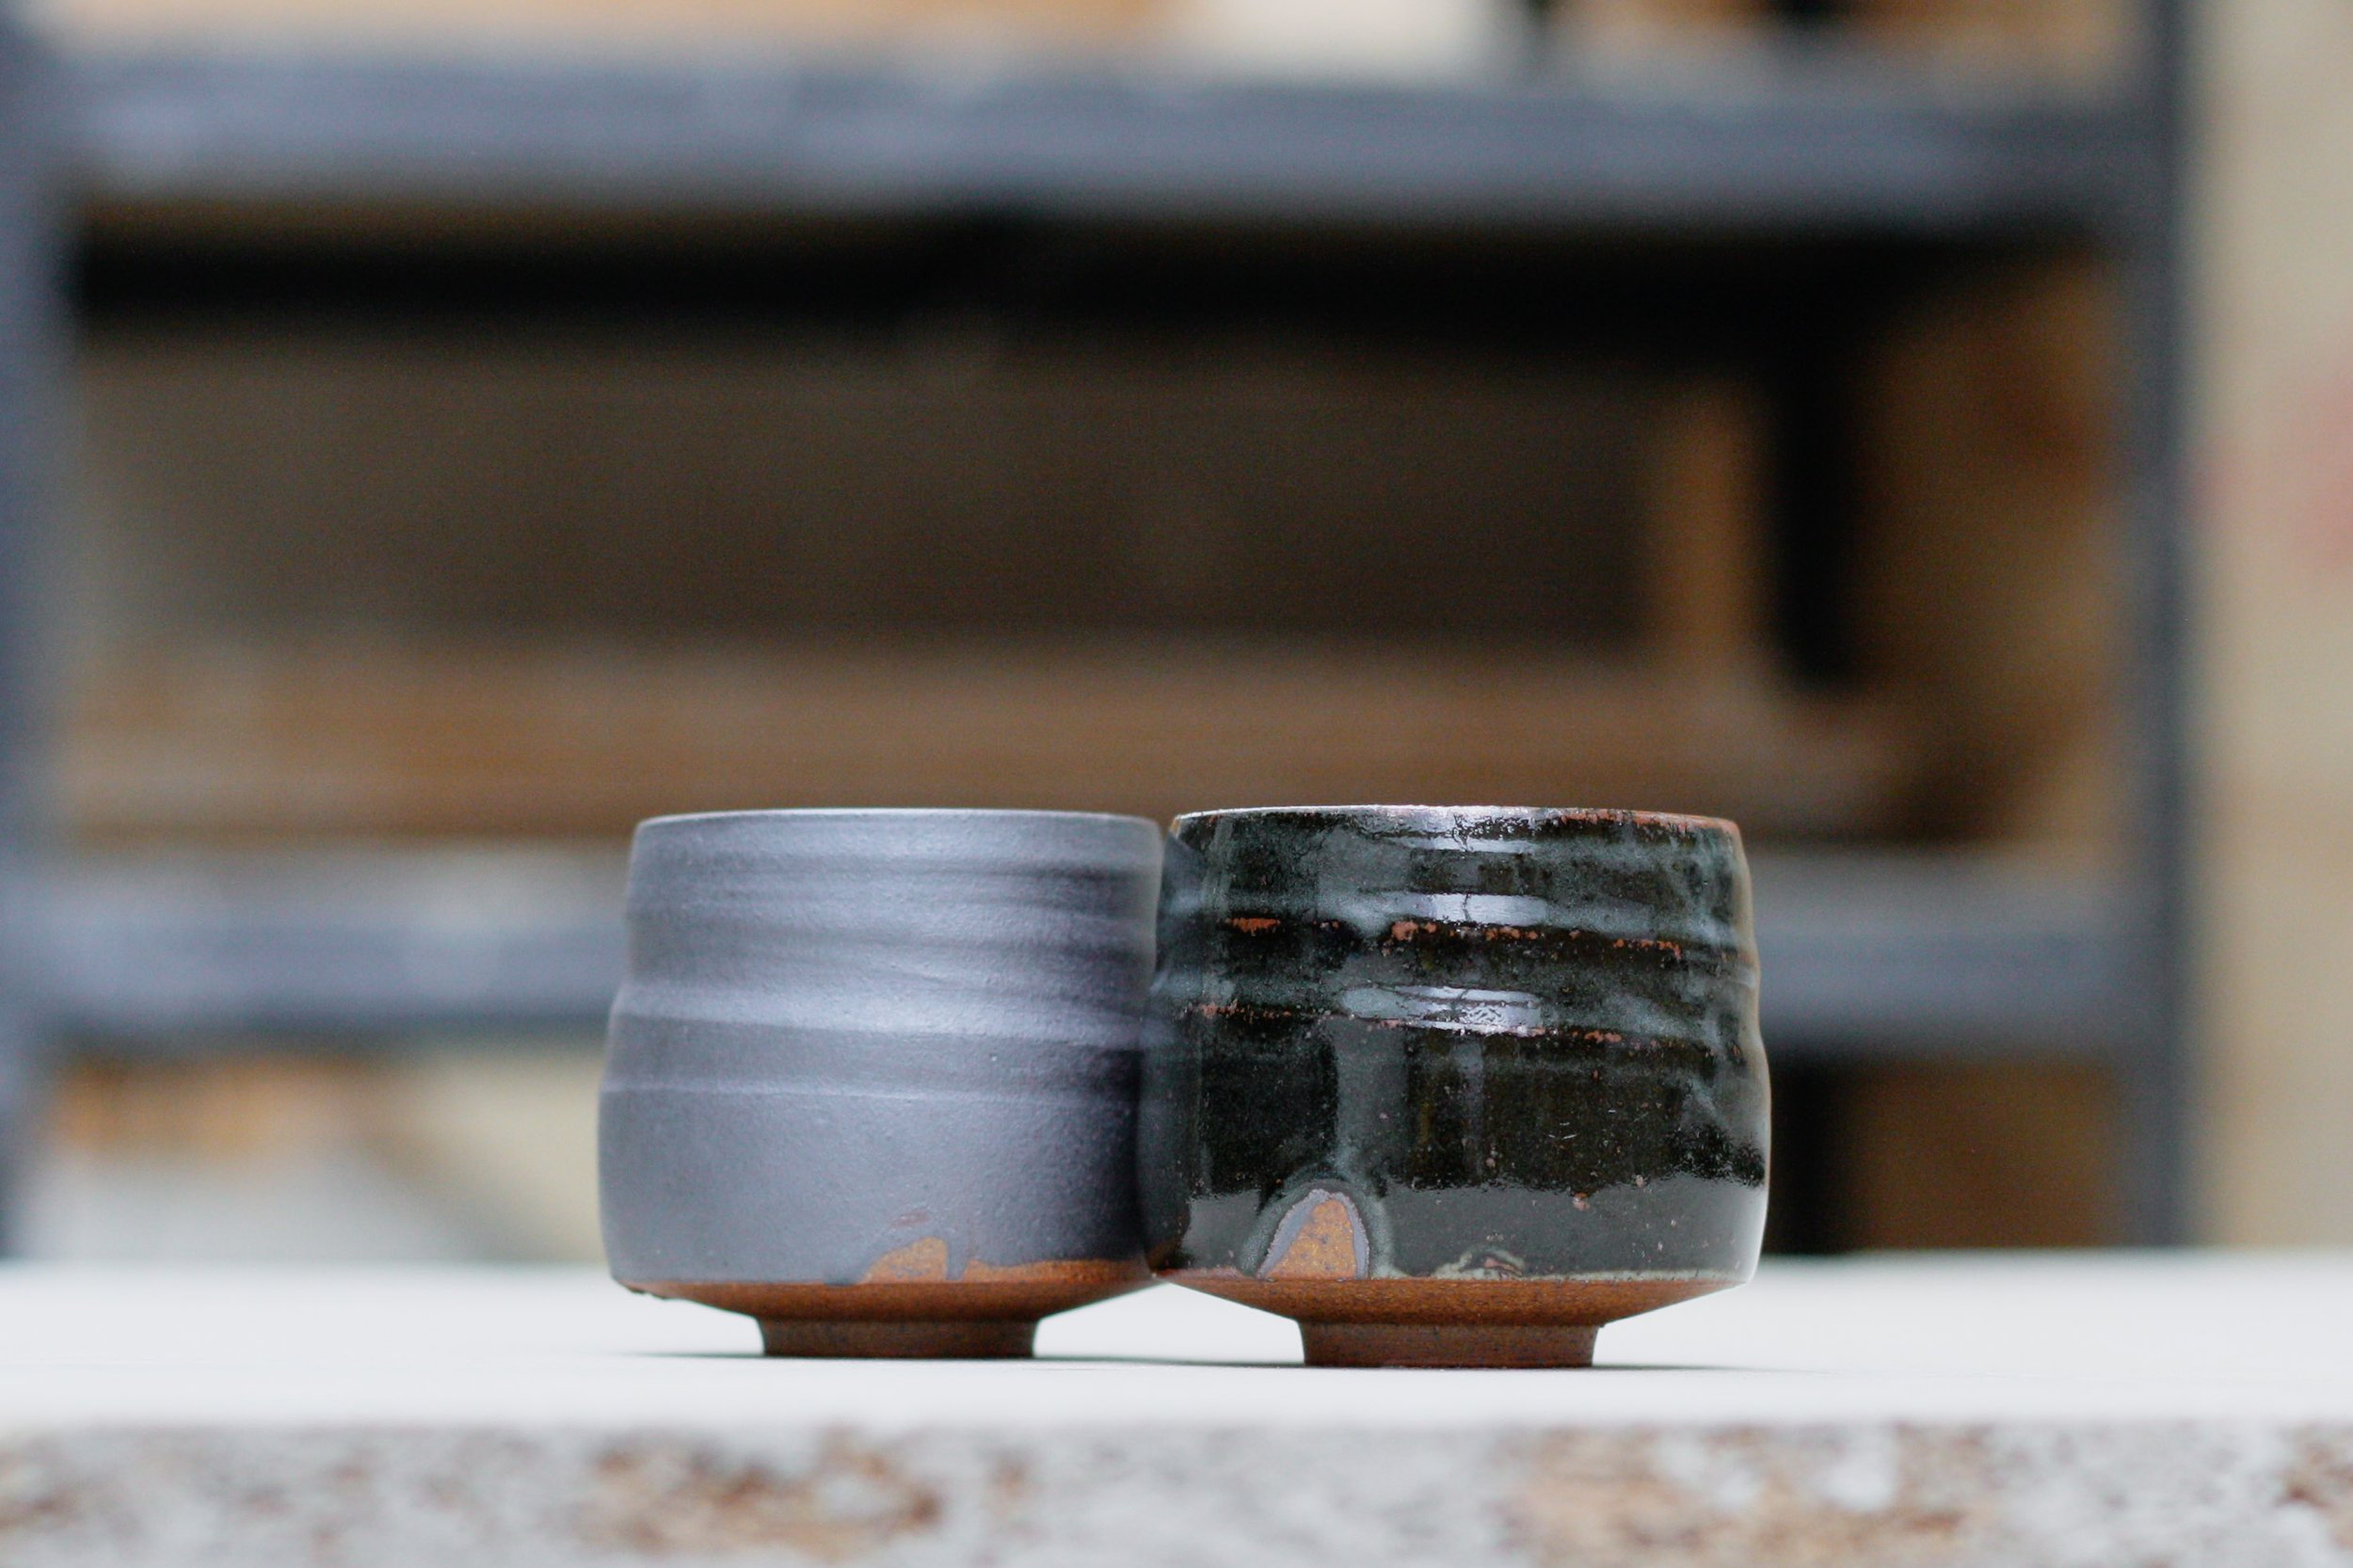
Grey stoneware with matt white dolomite glaze: reduction fired to 1280 degrees C
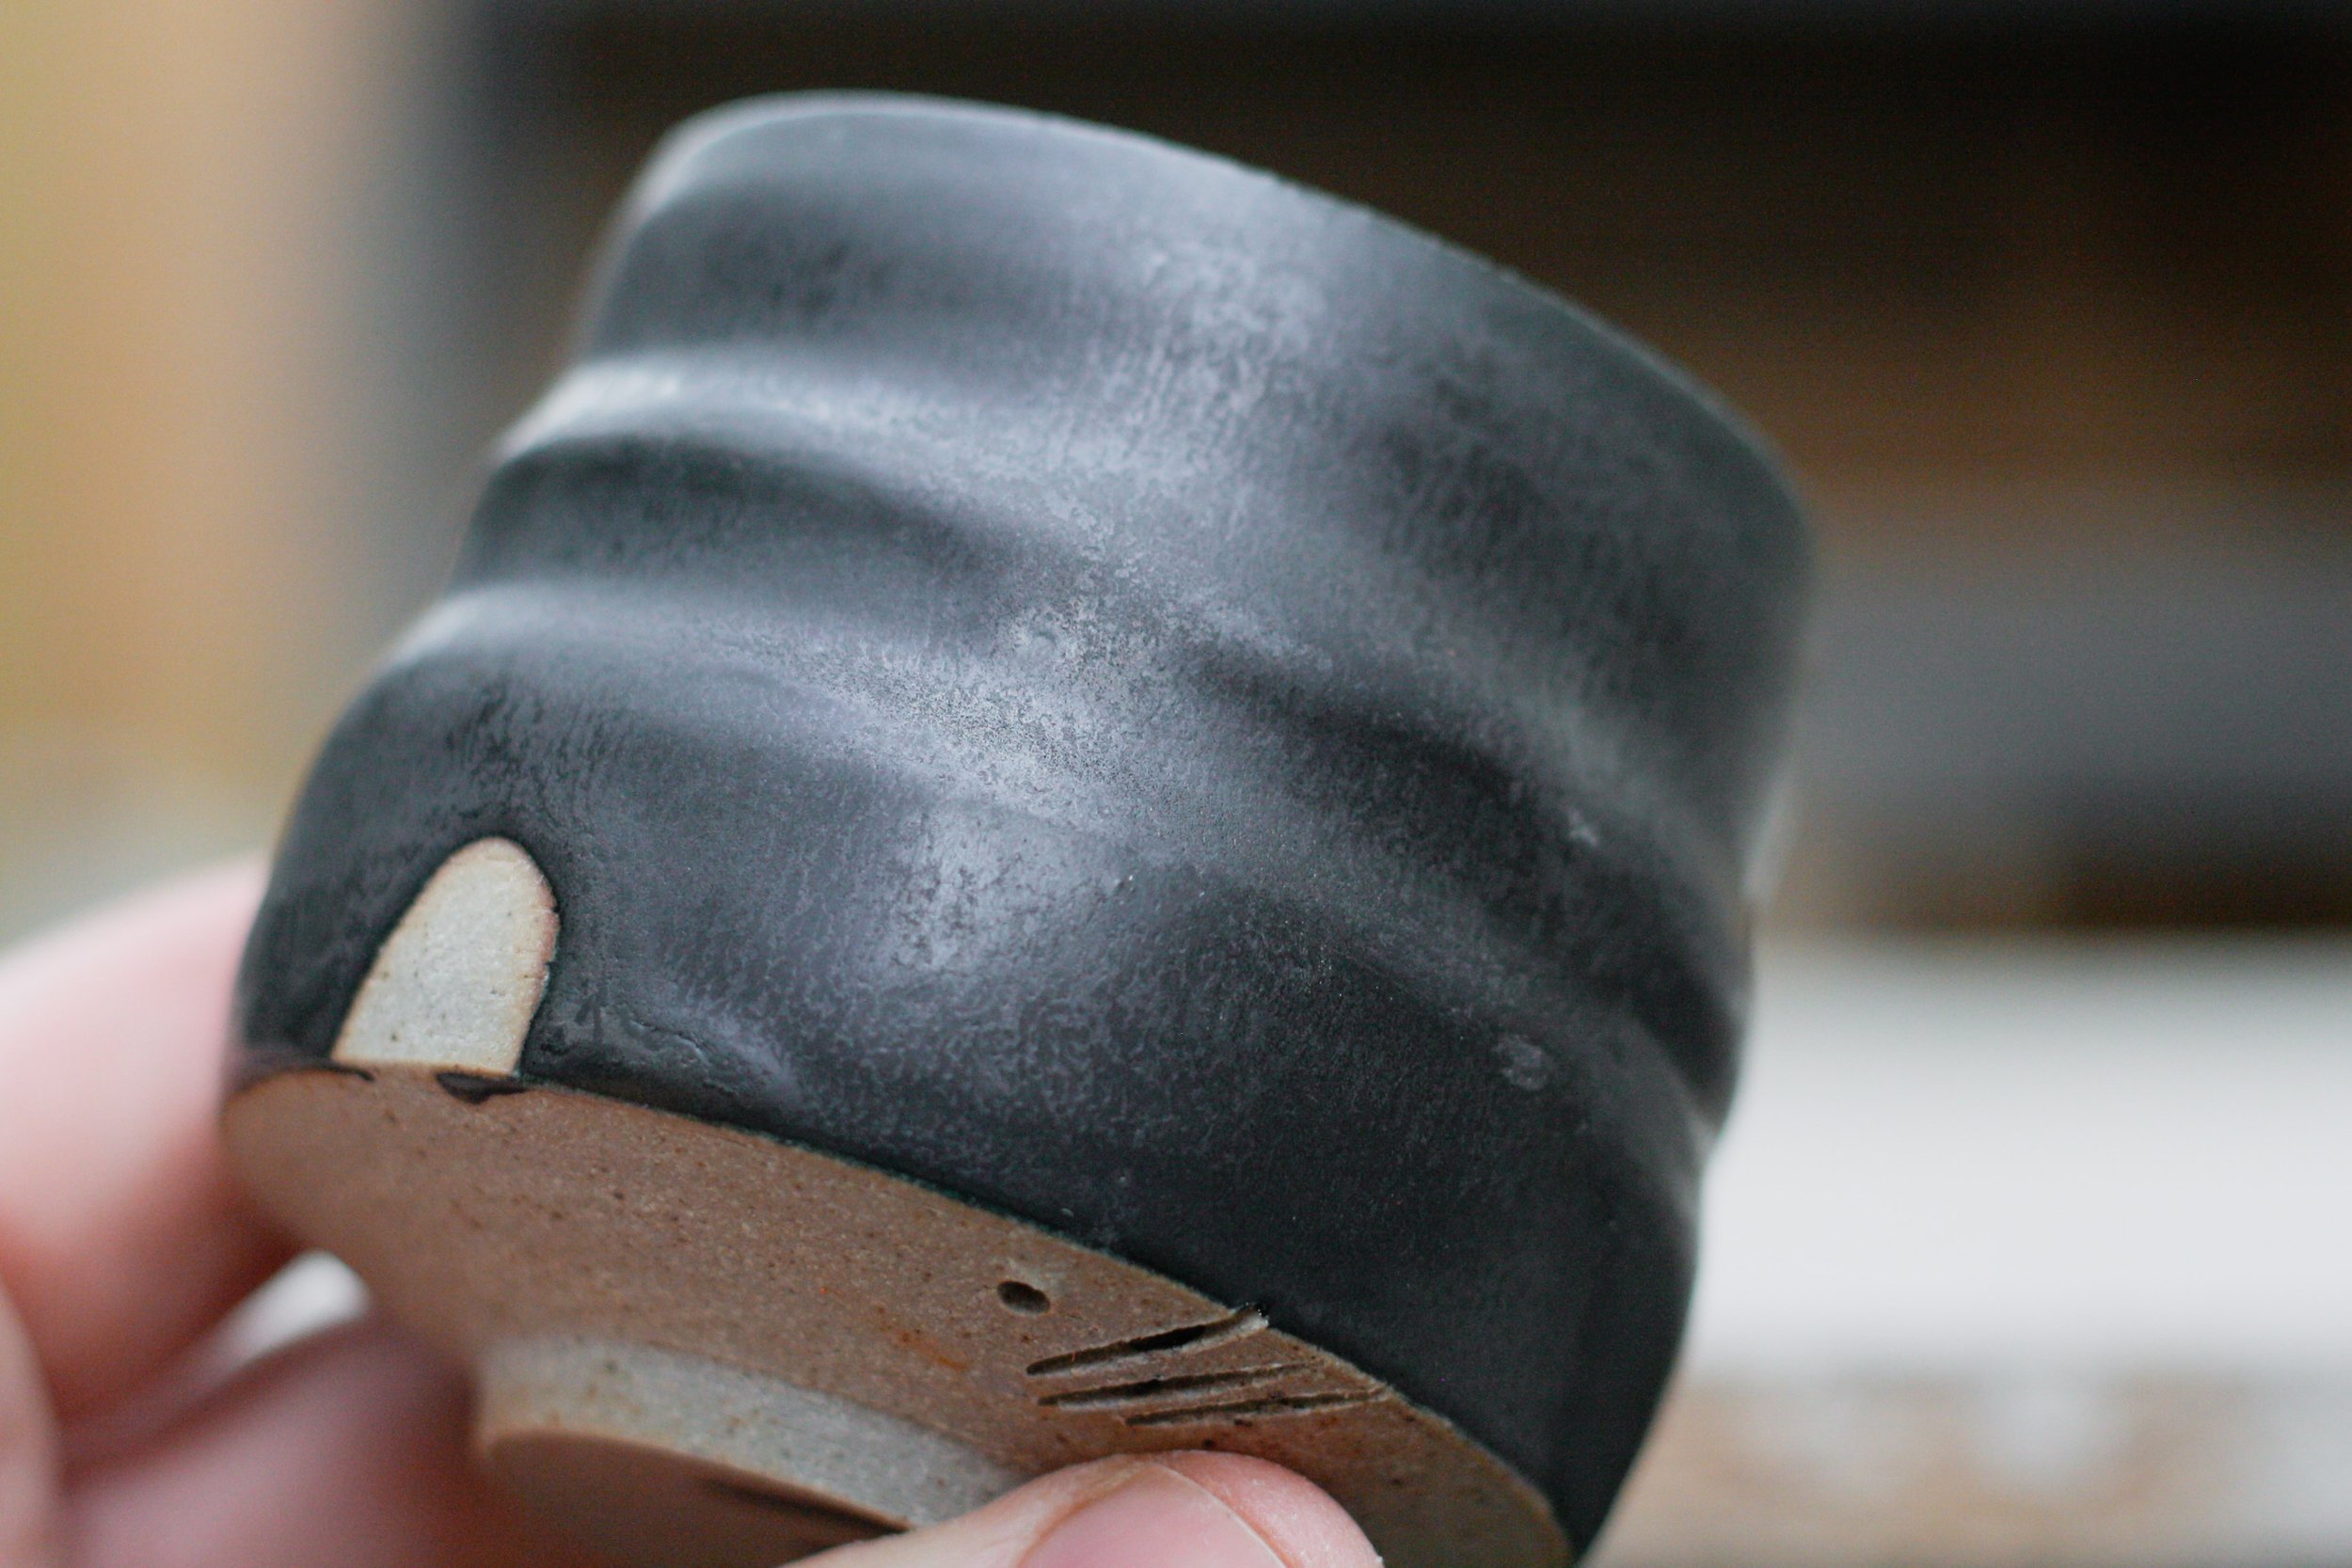
Grey stoneware with satin black glaze: reduction fired to 1290 degrees C

METHOD
HOW & WHY
pots not tiles
In my second year on the Artist, Designer: Maker course at Cardiff School of Art & Design I was fortunate enough to spend a week on a residential ceramics course in La Perdrix (just outside Bordeaux). The resident potter teaching us for the week insisted that if you’re making pots, it’s really worthwhile testing glaze on pots instead of tiles. While I still use tiles occasionally for all the usual reasons: speed of making, ease of glazing, ease of packing into the kiln and so on, I really took this testing advice to heart and have been making little test pots ever since. I’ve played around with little bowl and cylinder forms for glaze testing, but eventually started making miniature tea bowls and really loved the process and result.


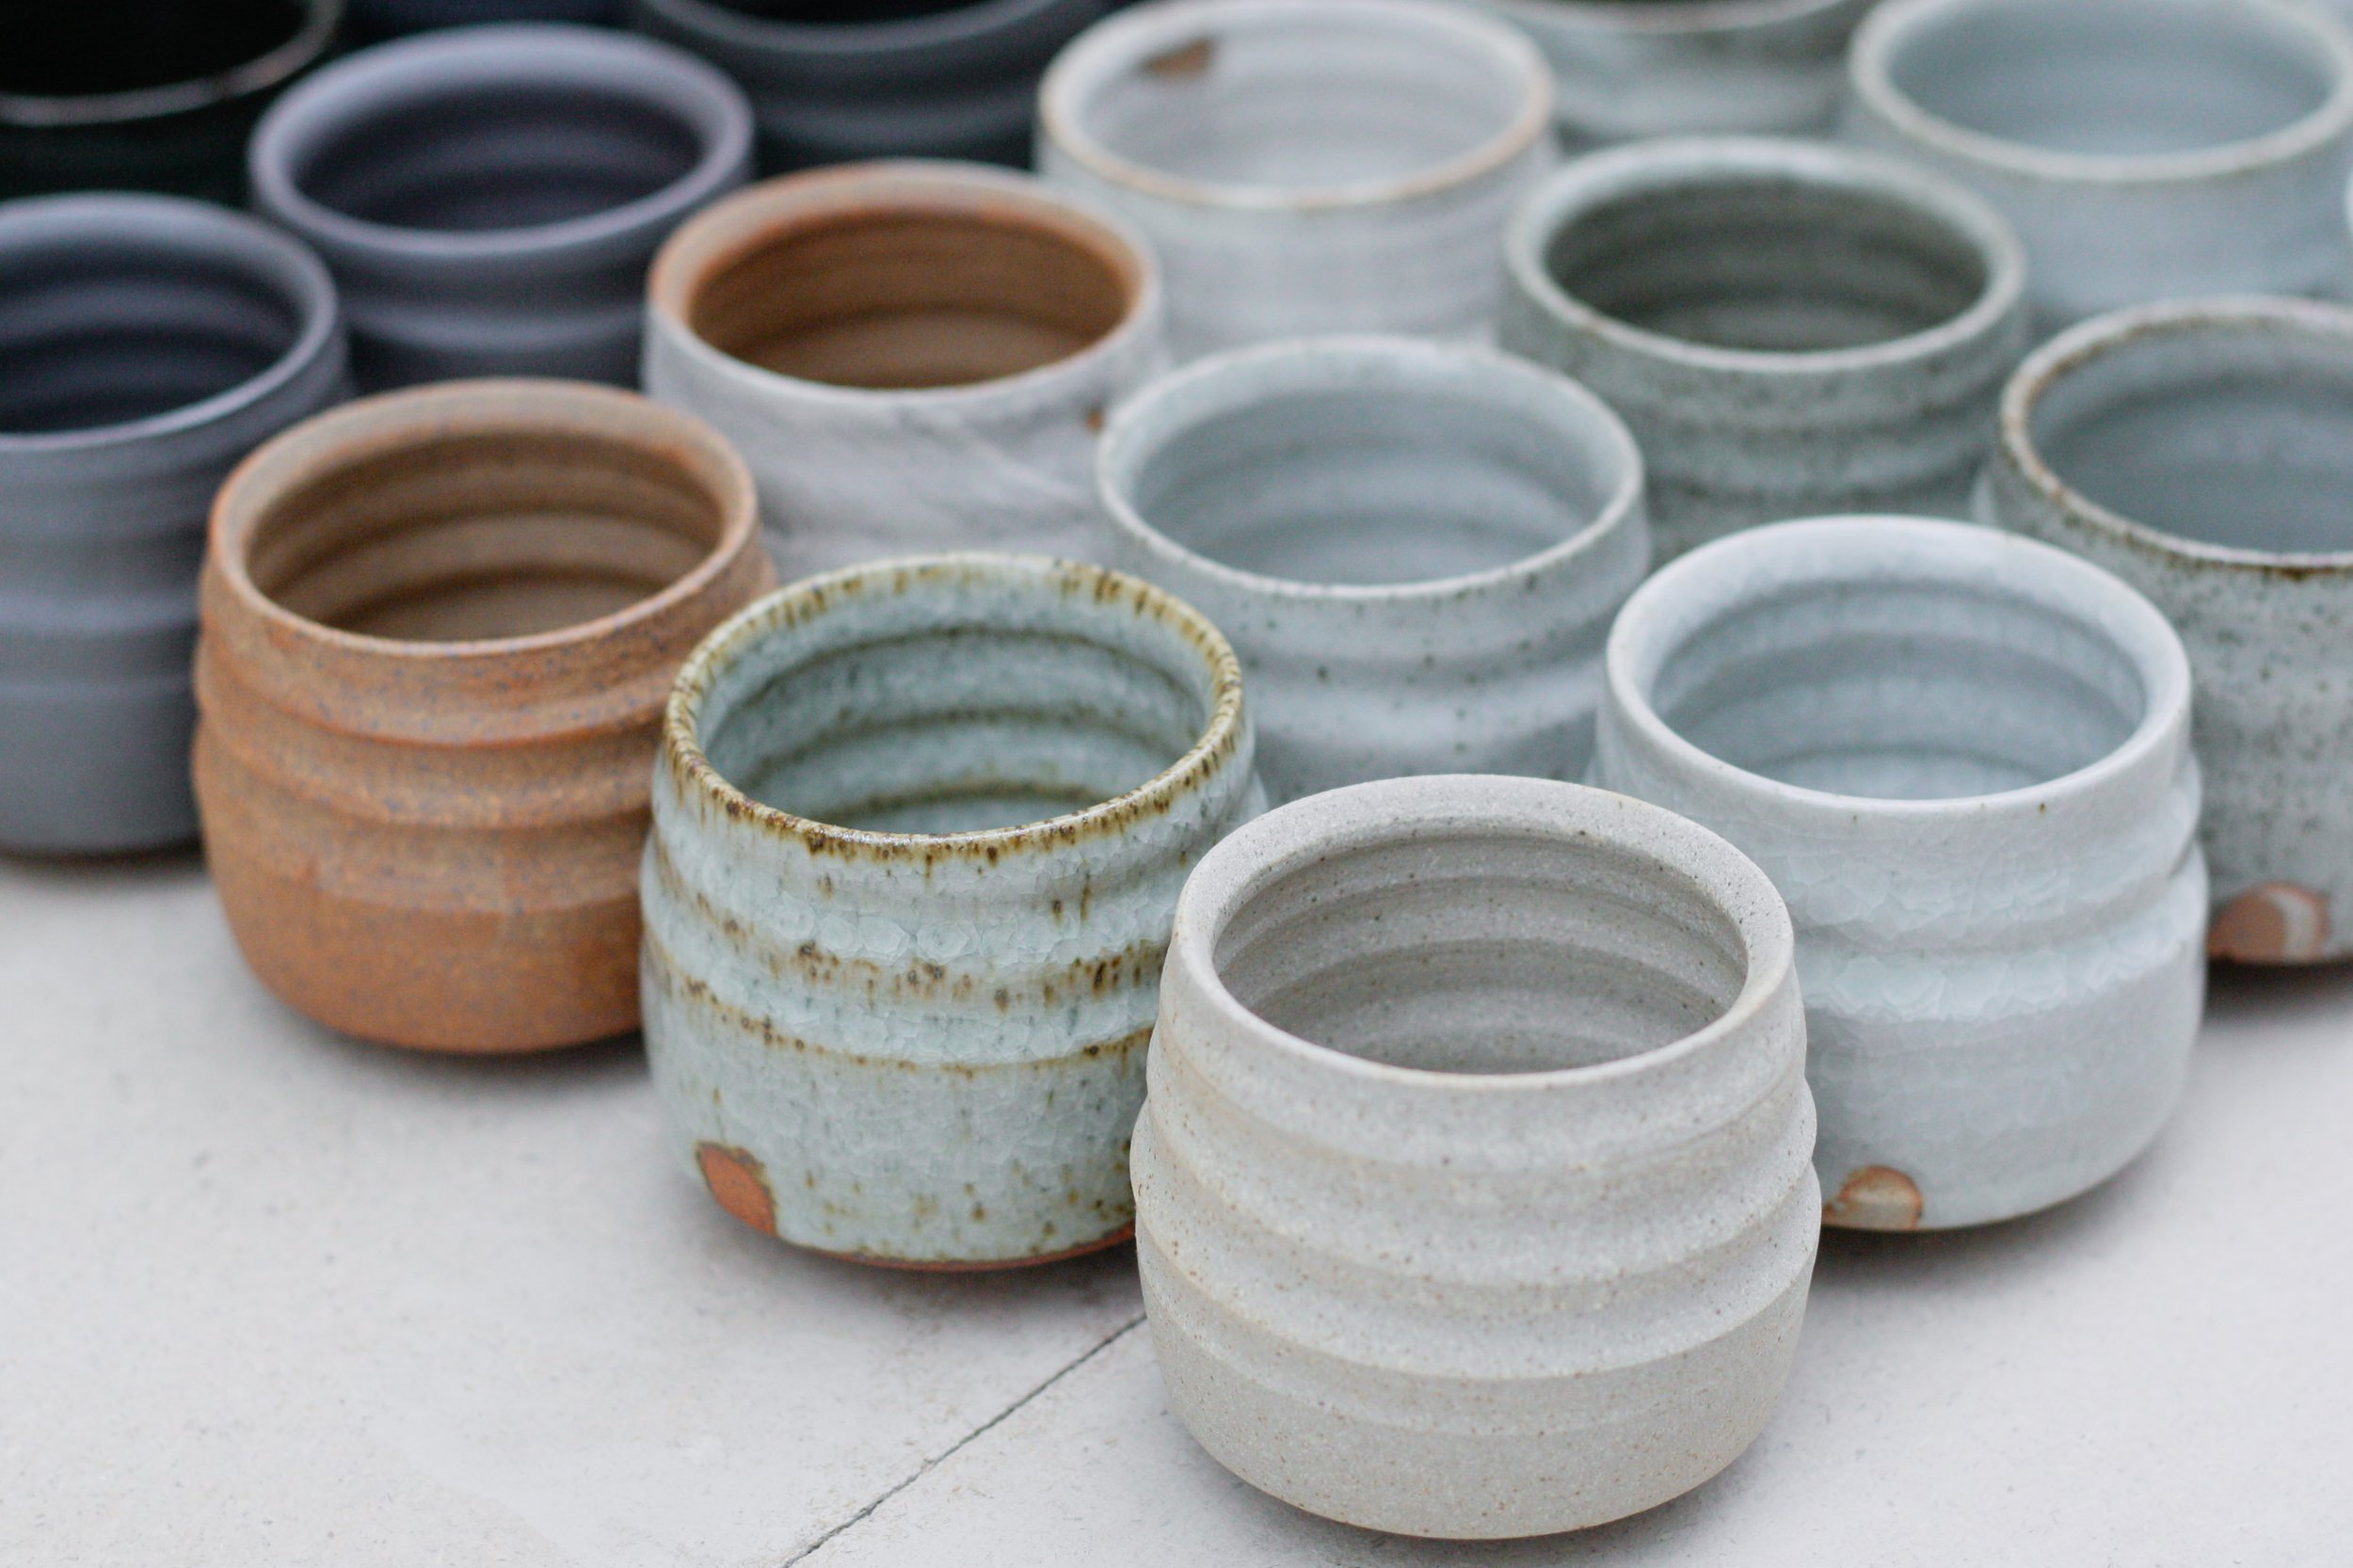
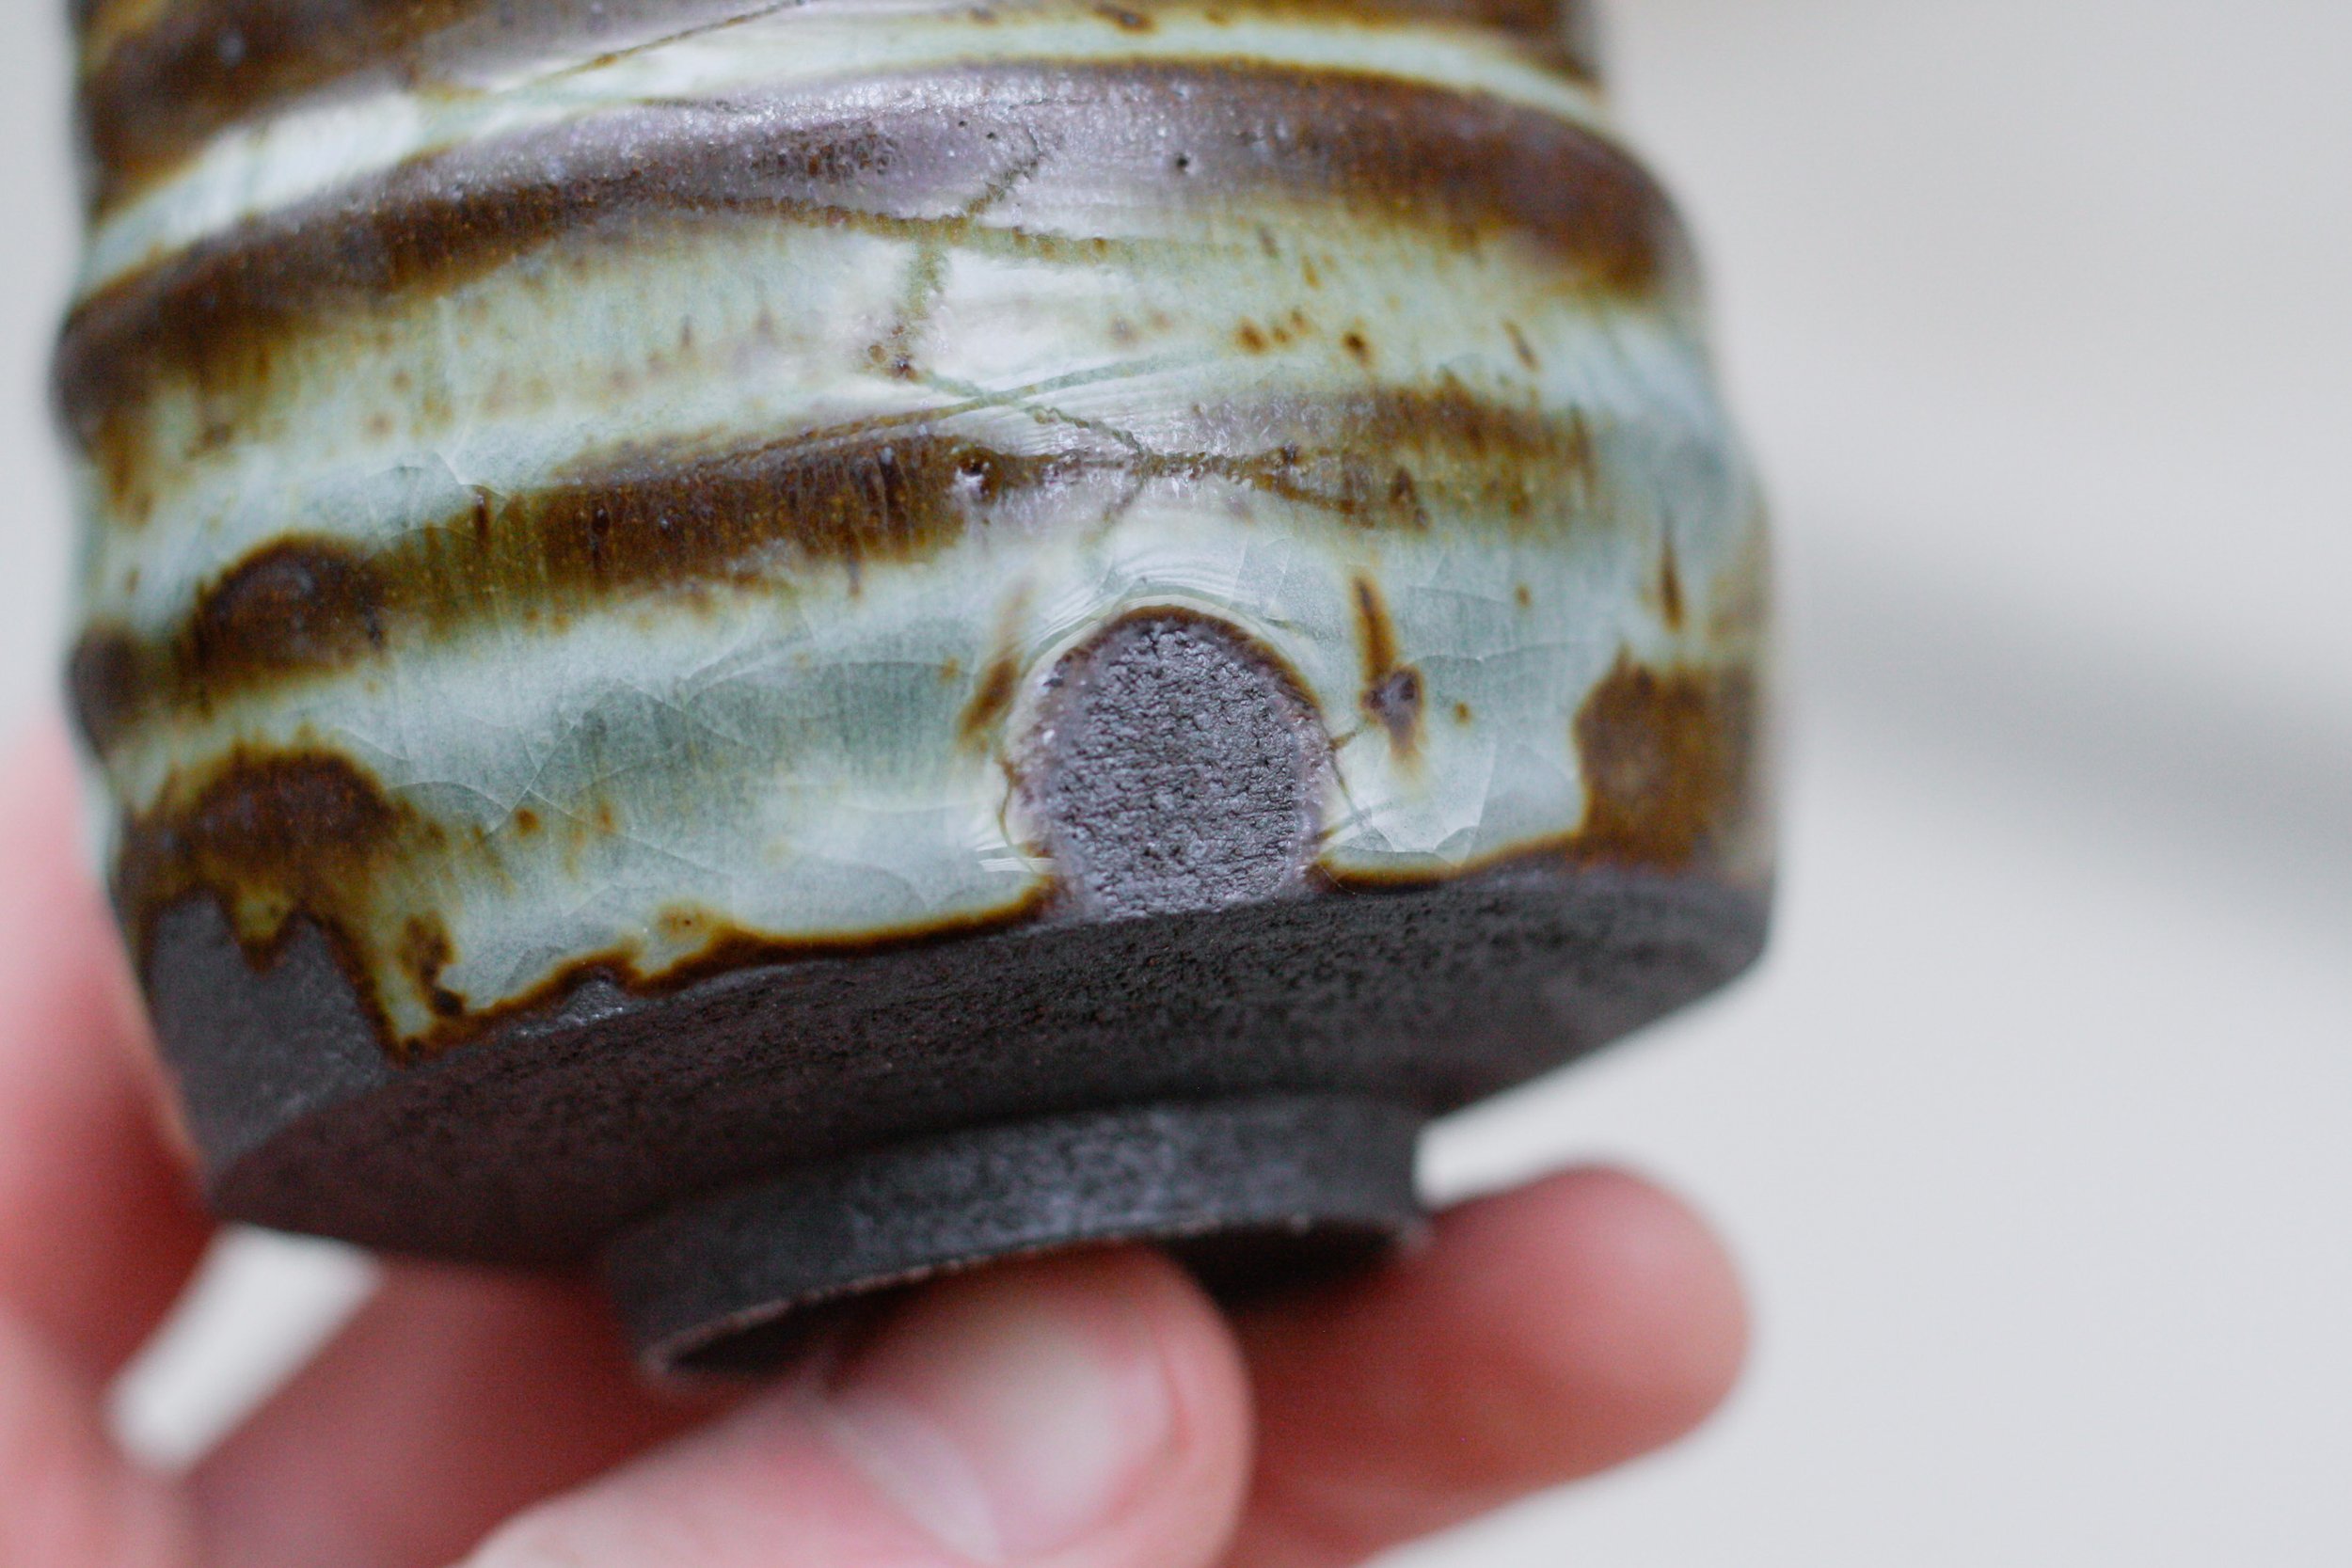
The rationale behind using pots as tests is that it will give you a better indication of how your slips and glazes behave on thrown forms (particularly on throwing lines, trimming marks and thrown rims) as well as demonstrating any variation between the interior and exterior surfaces: I have a tendency to glaze interiors a little thicker when I’m pouring and dipping glazes (which I do for all my test pieces). Throwing and turning lots of little pots is also a great opportunity for practicing repetition work earlier on in any potters career. I made around 100 pieces for the final round of testing and it was a great exercise for me. The throwing was done to a pointer, aiming for speed and efficiency and not labouring over being too exact.
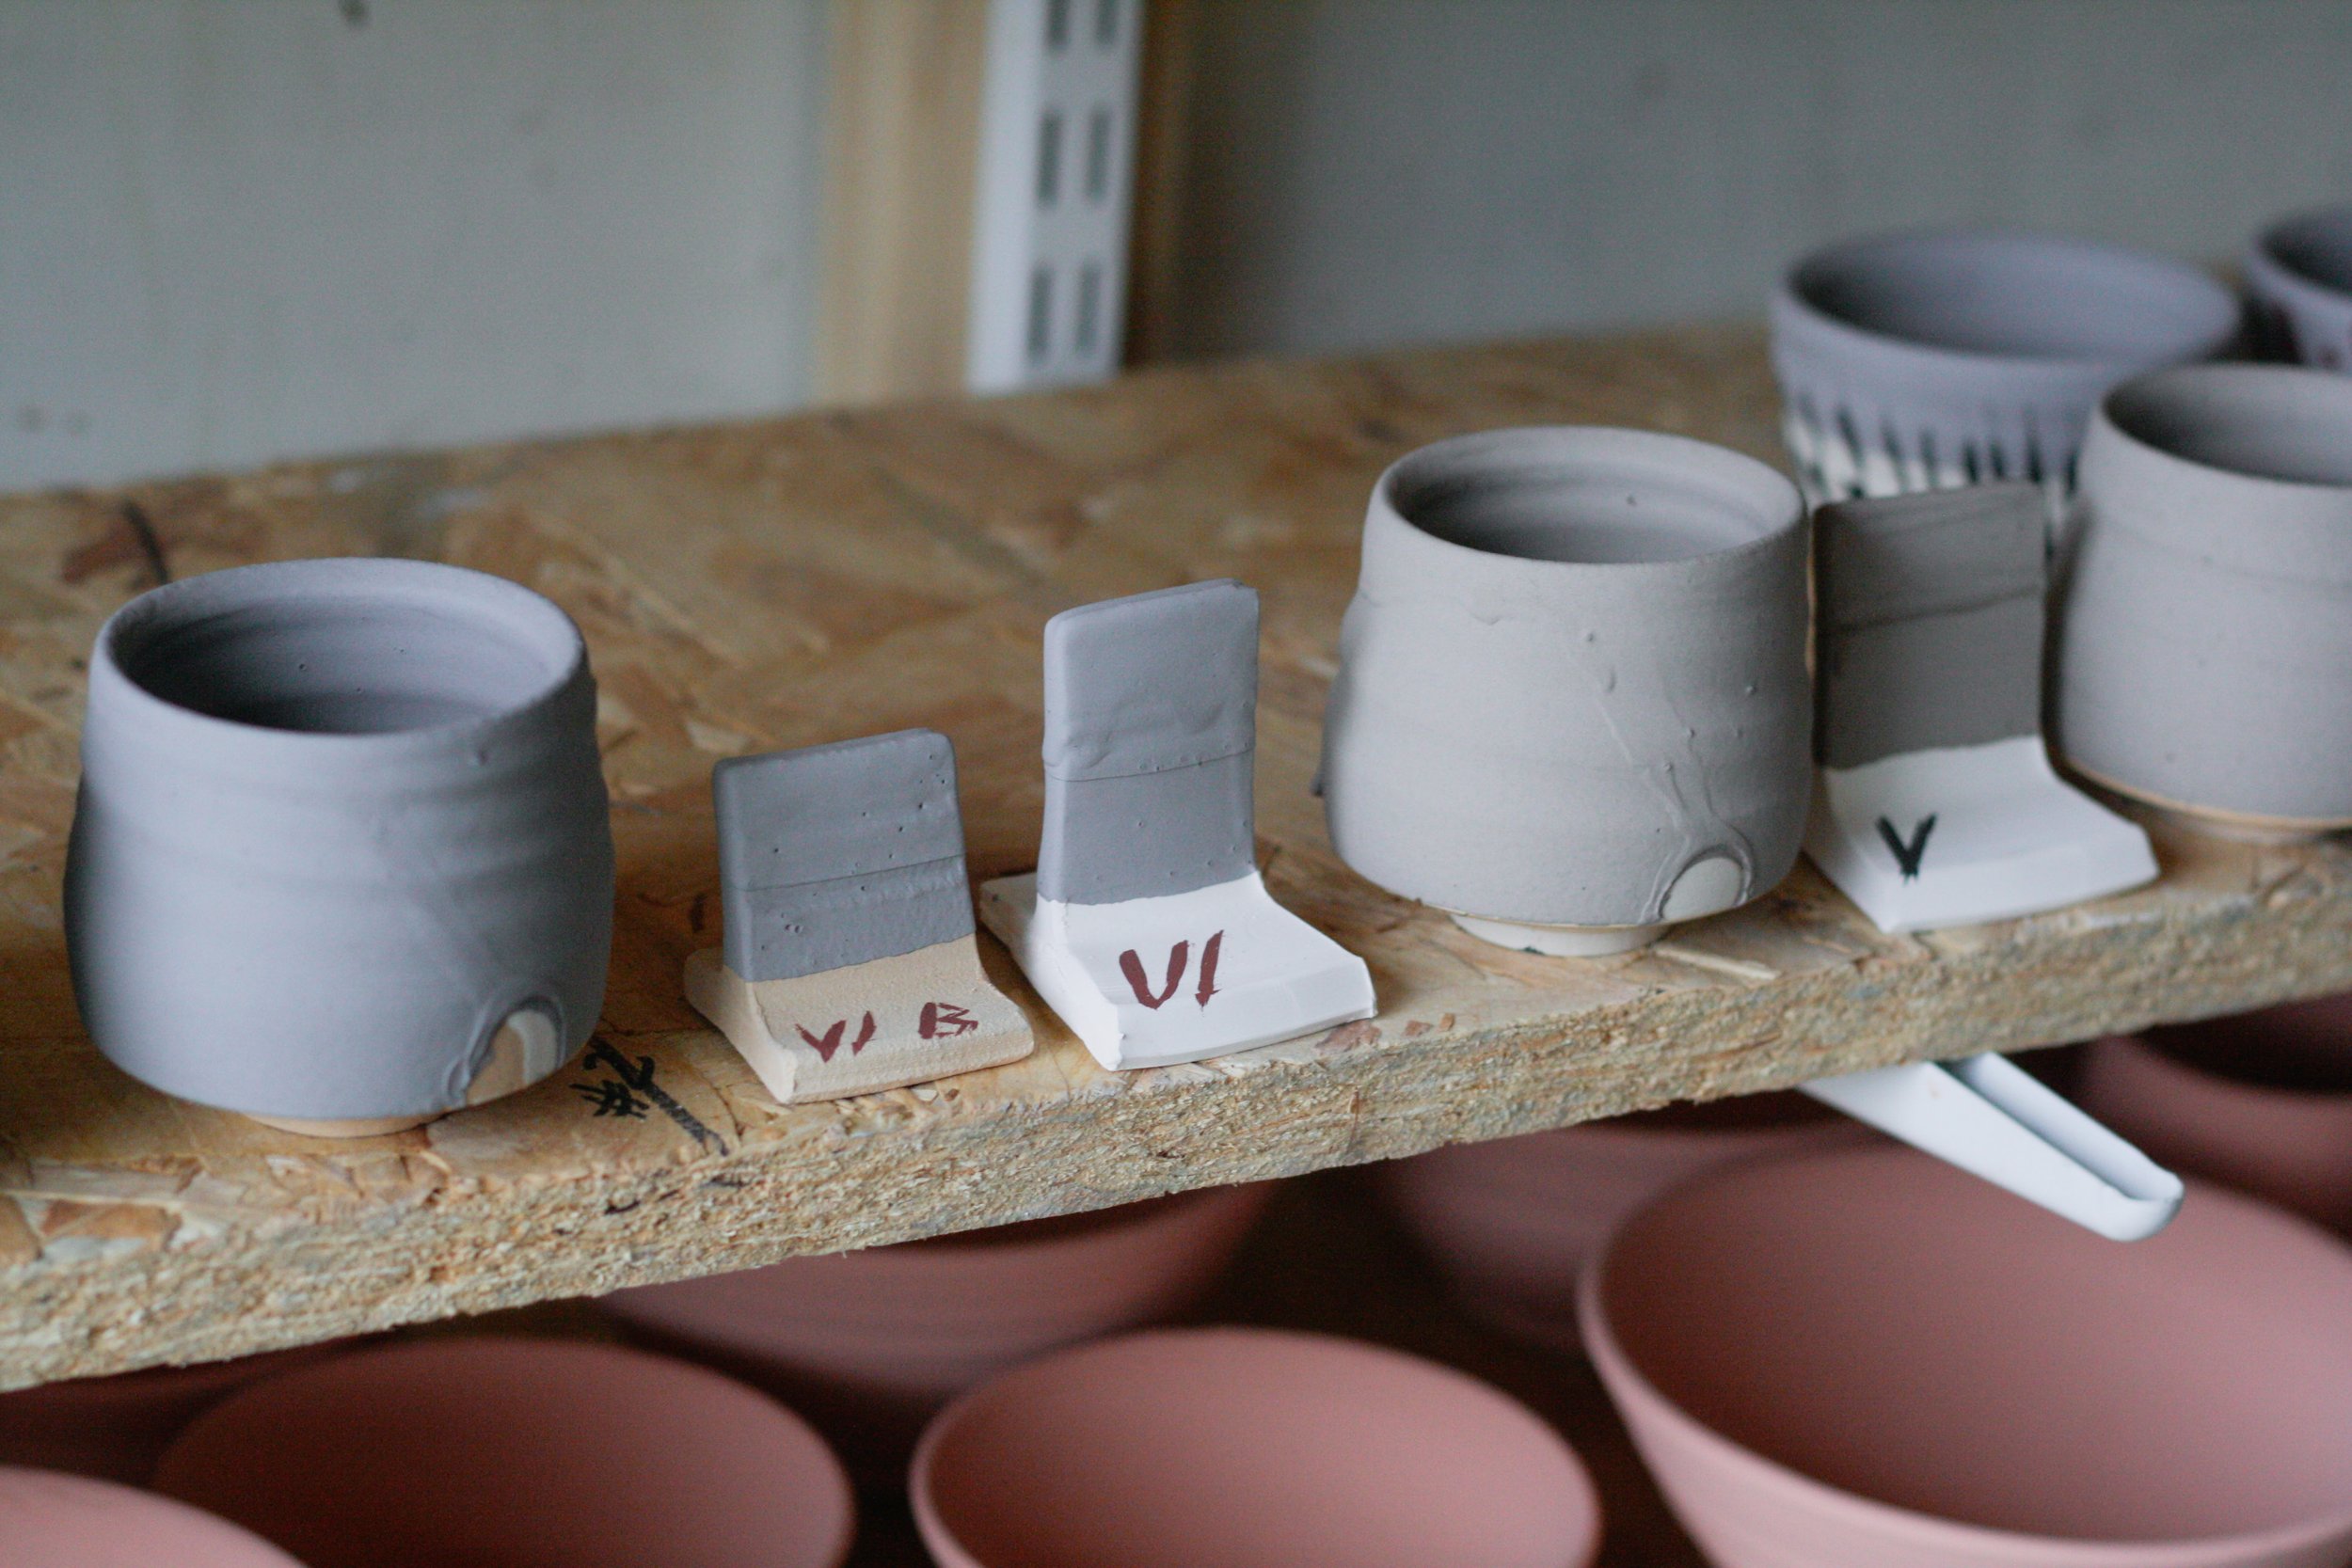
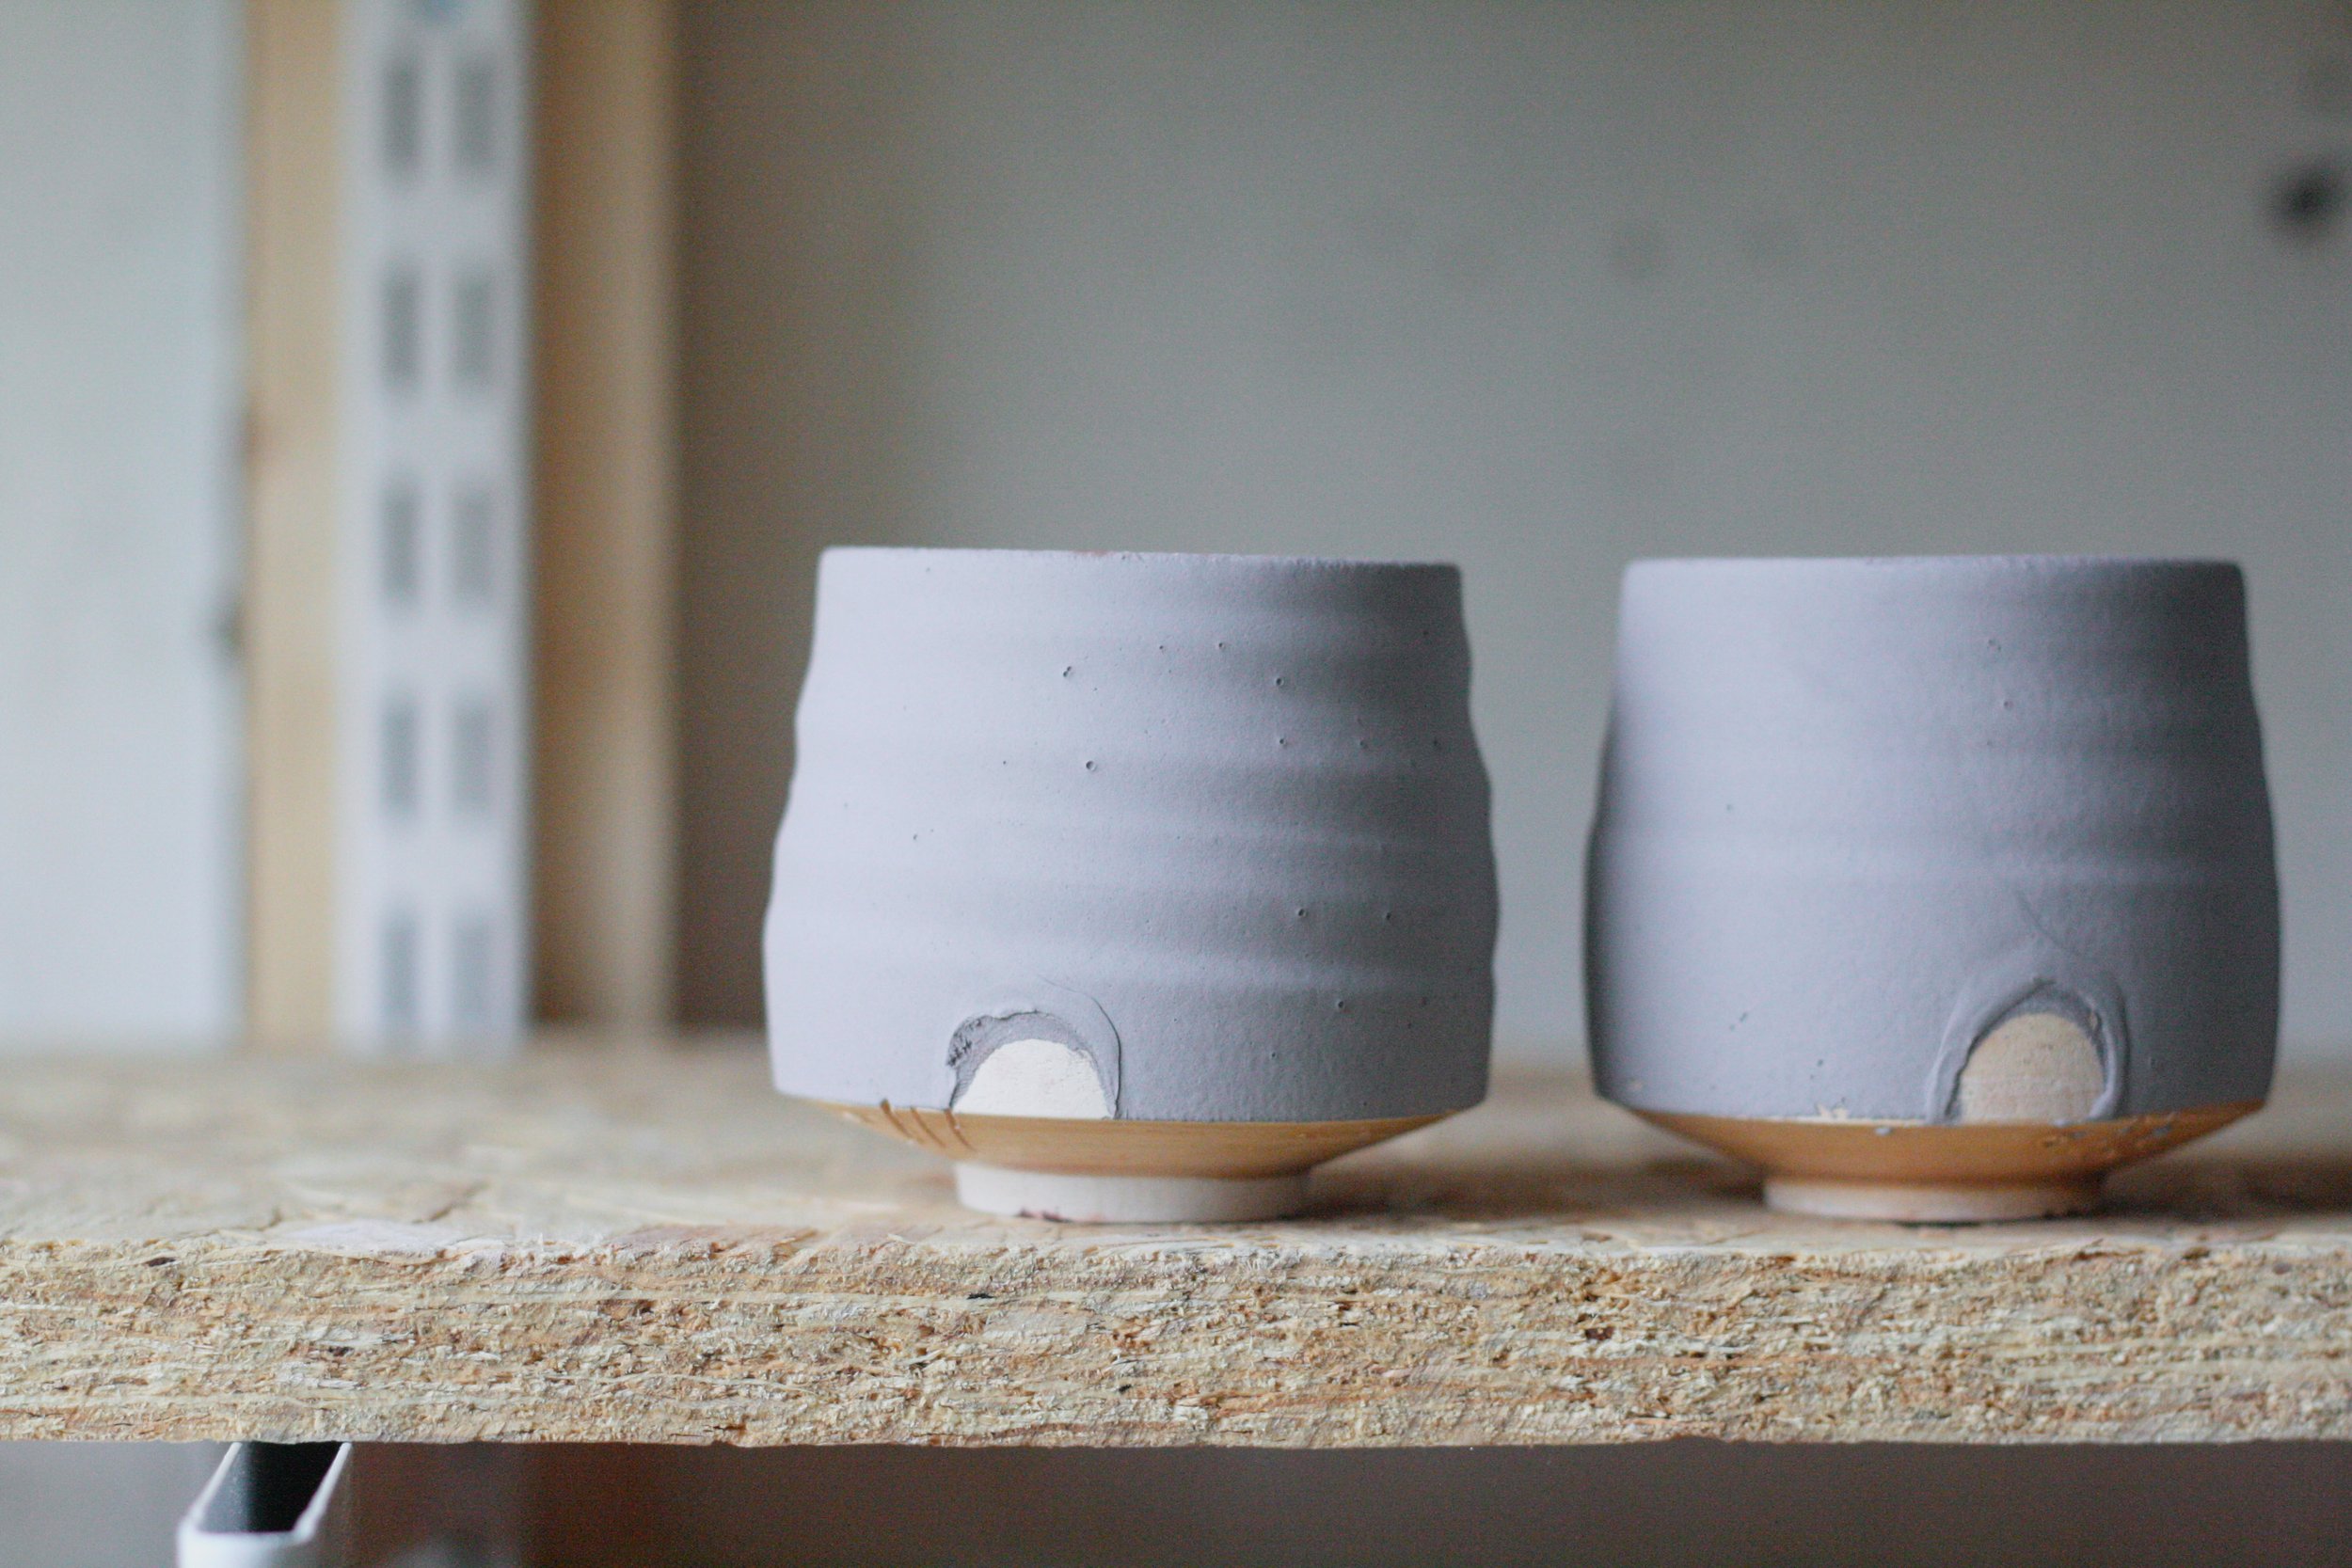
The little flared tea bowls above are the first iteration of the pieces that now form my definitive library. I changed the form and scale a little, allowing more surface area for clearer results and a bigger internal volume for potential use as cups further down the line. As well as acting as a first iteration of the final form, the pots above were approximations of some of my clay/slip/glaze combinations and were a valuable set of tests in and of themselves. Using reactive slips and glazes in the gas kiln in this way can depend quite heavily on the thickness of application, so some trial runs before commiting to a big batch of tests is well worthwhile.

THE GRAND PLAN
SLIPS AND GLAZES
From the beginning of my pottery endeavours I knew I wanted to make gas fired stoneware. The cool, natural tones and the simplicity of many of the material approaches available really drew me in early on and I haven’t deviated since my very first tests came out of the gas kiln on my BA in 2016. In conjunction with my focus on this approach, I was lucky enough to apprentice with the sensational Micki Schloessingk for a few summers in the Gower where she makes wonderful wood fired salt glaze pots. Working with Micki taught me lots of things, but something that really stood out was how much she achieved through clay bodies and slips alone. I’ve never liked the idea of having lots and lots of glazes on the go, and the realisation that a single glaze in combination with a few slips and clay bodies could give me a whole host of finishes was a really crucial one for me.
Following this approach I decided to test all the possible combinations of a few slips and glazes (that I had already been working on) with a few different clay bodies. Subsequently, the library above mainly consists of:
3 clay bodies
4 slips
3 glazes
There are 3 more glaze surfaces involved that I only use by themselves (meaning not in conjunction with any slips or varied clay bodies), but that’s still only 6 glazes for well over 20 outcomes in total. My testing matrix is pictured below. Over the last few years I had already tested nearly every possible combination in the matrix once, so I had a good idea what was worth retesting. The X’s mark the combinations I used for the final round of tests and the bold X’s are the finishes that were selected for the library and pictured above. If you’re ever doing a big batch of testing in this manner I cannot recommend making friends with Excel enough.
TERMS: For those that don’t know: a clay body is the actual material that the pot is formed from; a slip is a liquid clay that is applied to the surface of the formed pot which can sometimes contain colourants in the forms of heavy metals or commercially made stains; a glaze is a mixture of powdered minerals, usually rock, glass formers (quartz), melting agents (fluxes) and stabilisers (usually in the form of clay).
Once I had finalised the combinations above, I made up all the necessary slips and glazes and set about making the pots. All the stoneware pieces were thrown from 300g of clay to a pointer and turned (trimmed) on a chuck once leather hard. I also made up a few tests in porcelain which were made from a little more clay and thrown to a bigger size to compensate for their additional shrinkage. Following that, I slipped the pots that required it, pouring and dipping them or brushing them as specified in the matrix. Brushing slips leads to much greater thickness variation and therefore greater variation in the appearance of the final fired surface of the pot. Dipping and pouring are much better for regular thickness, so I usually try both methods when testing a new slip.
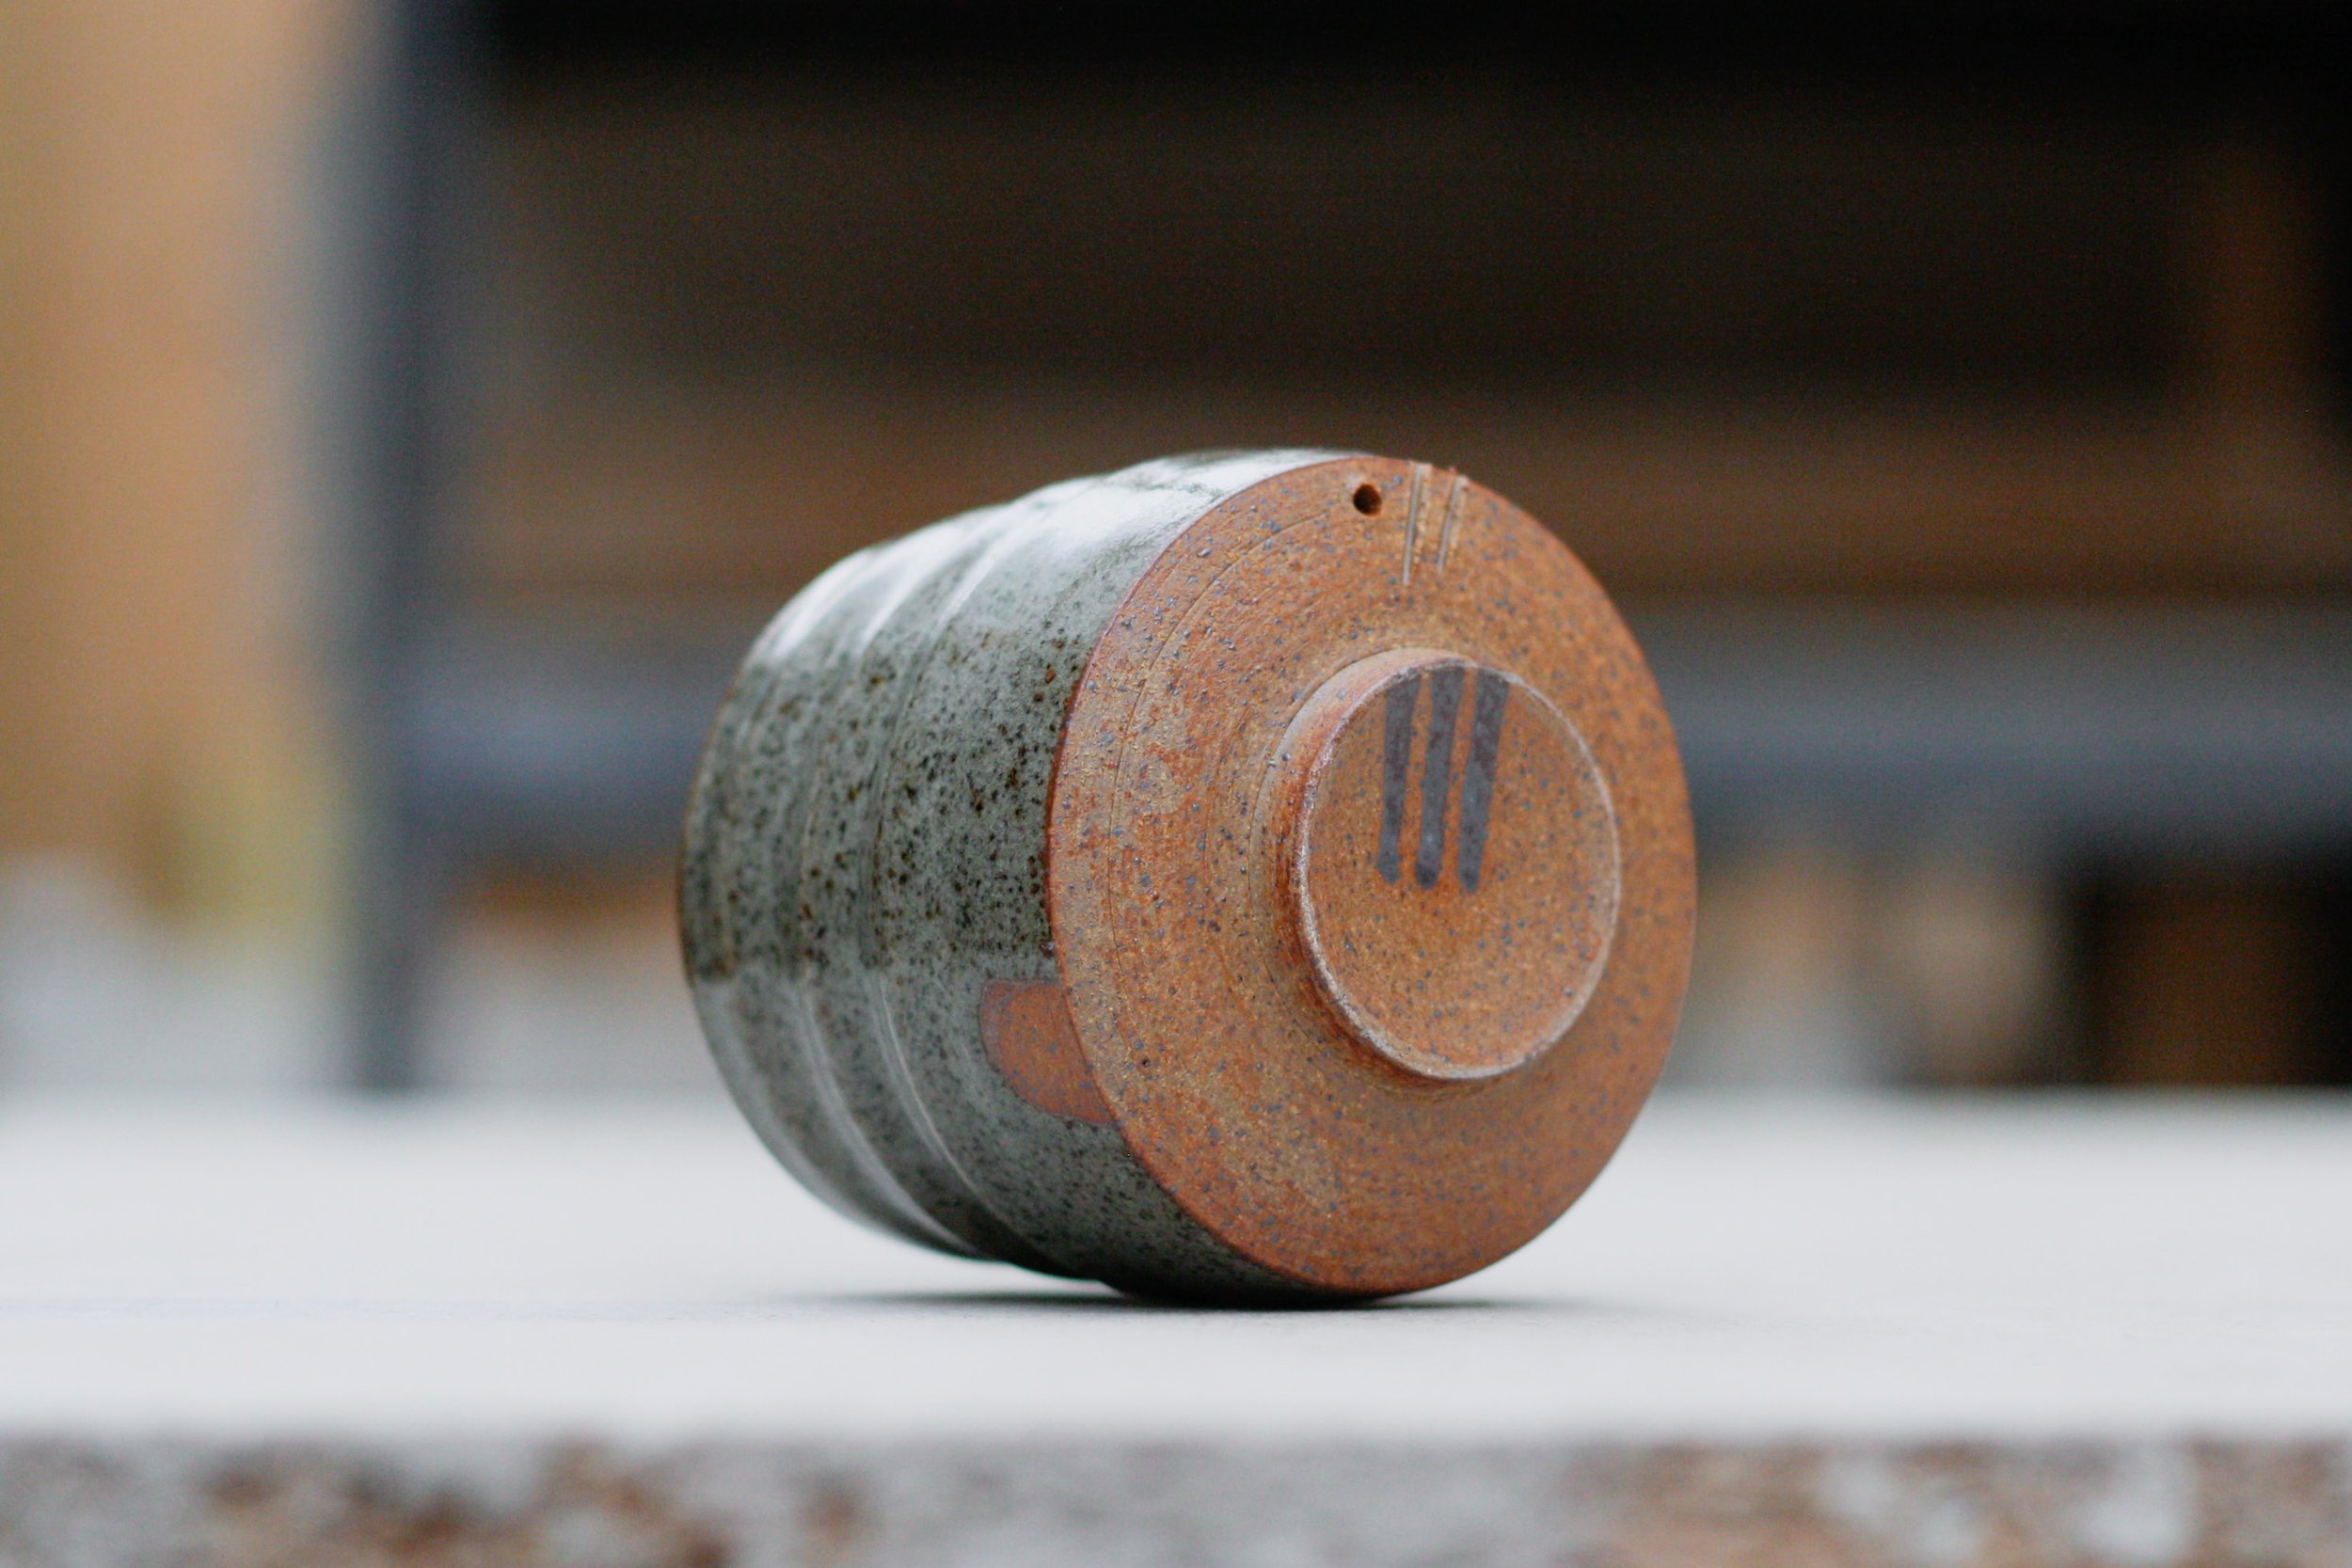
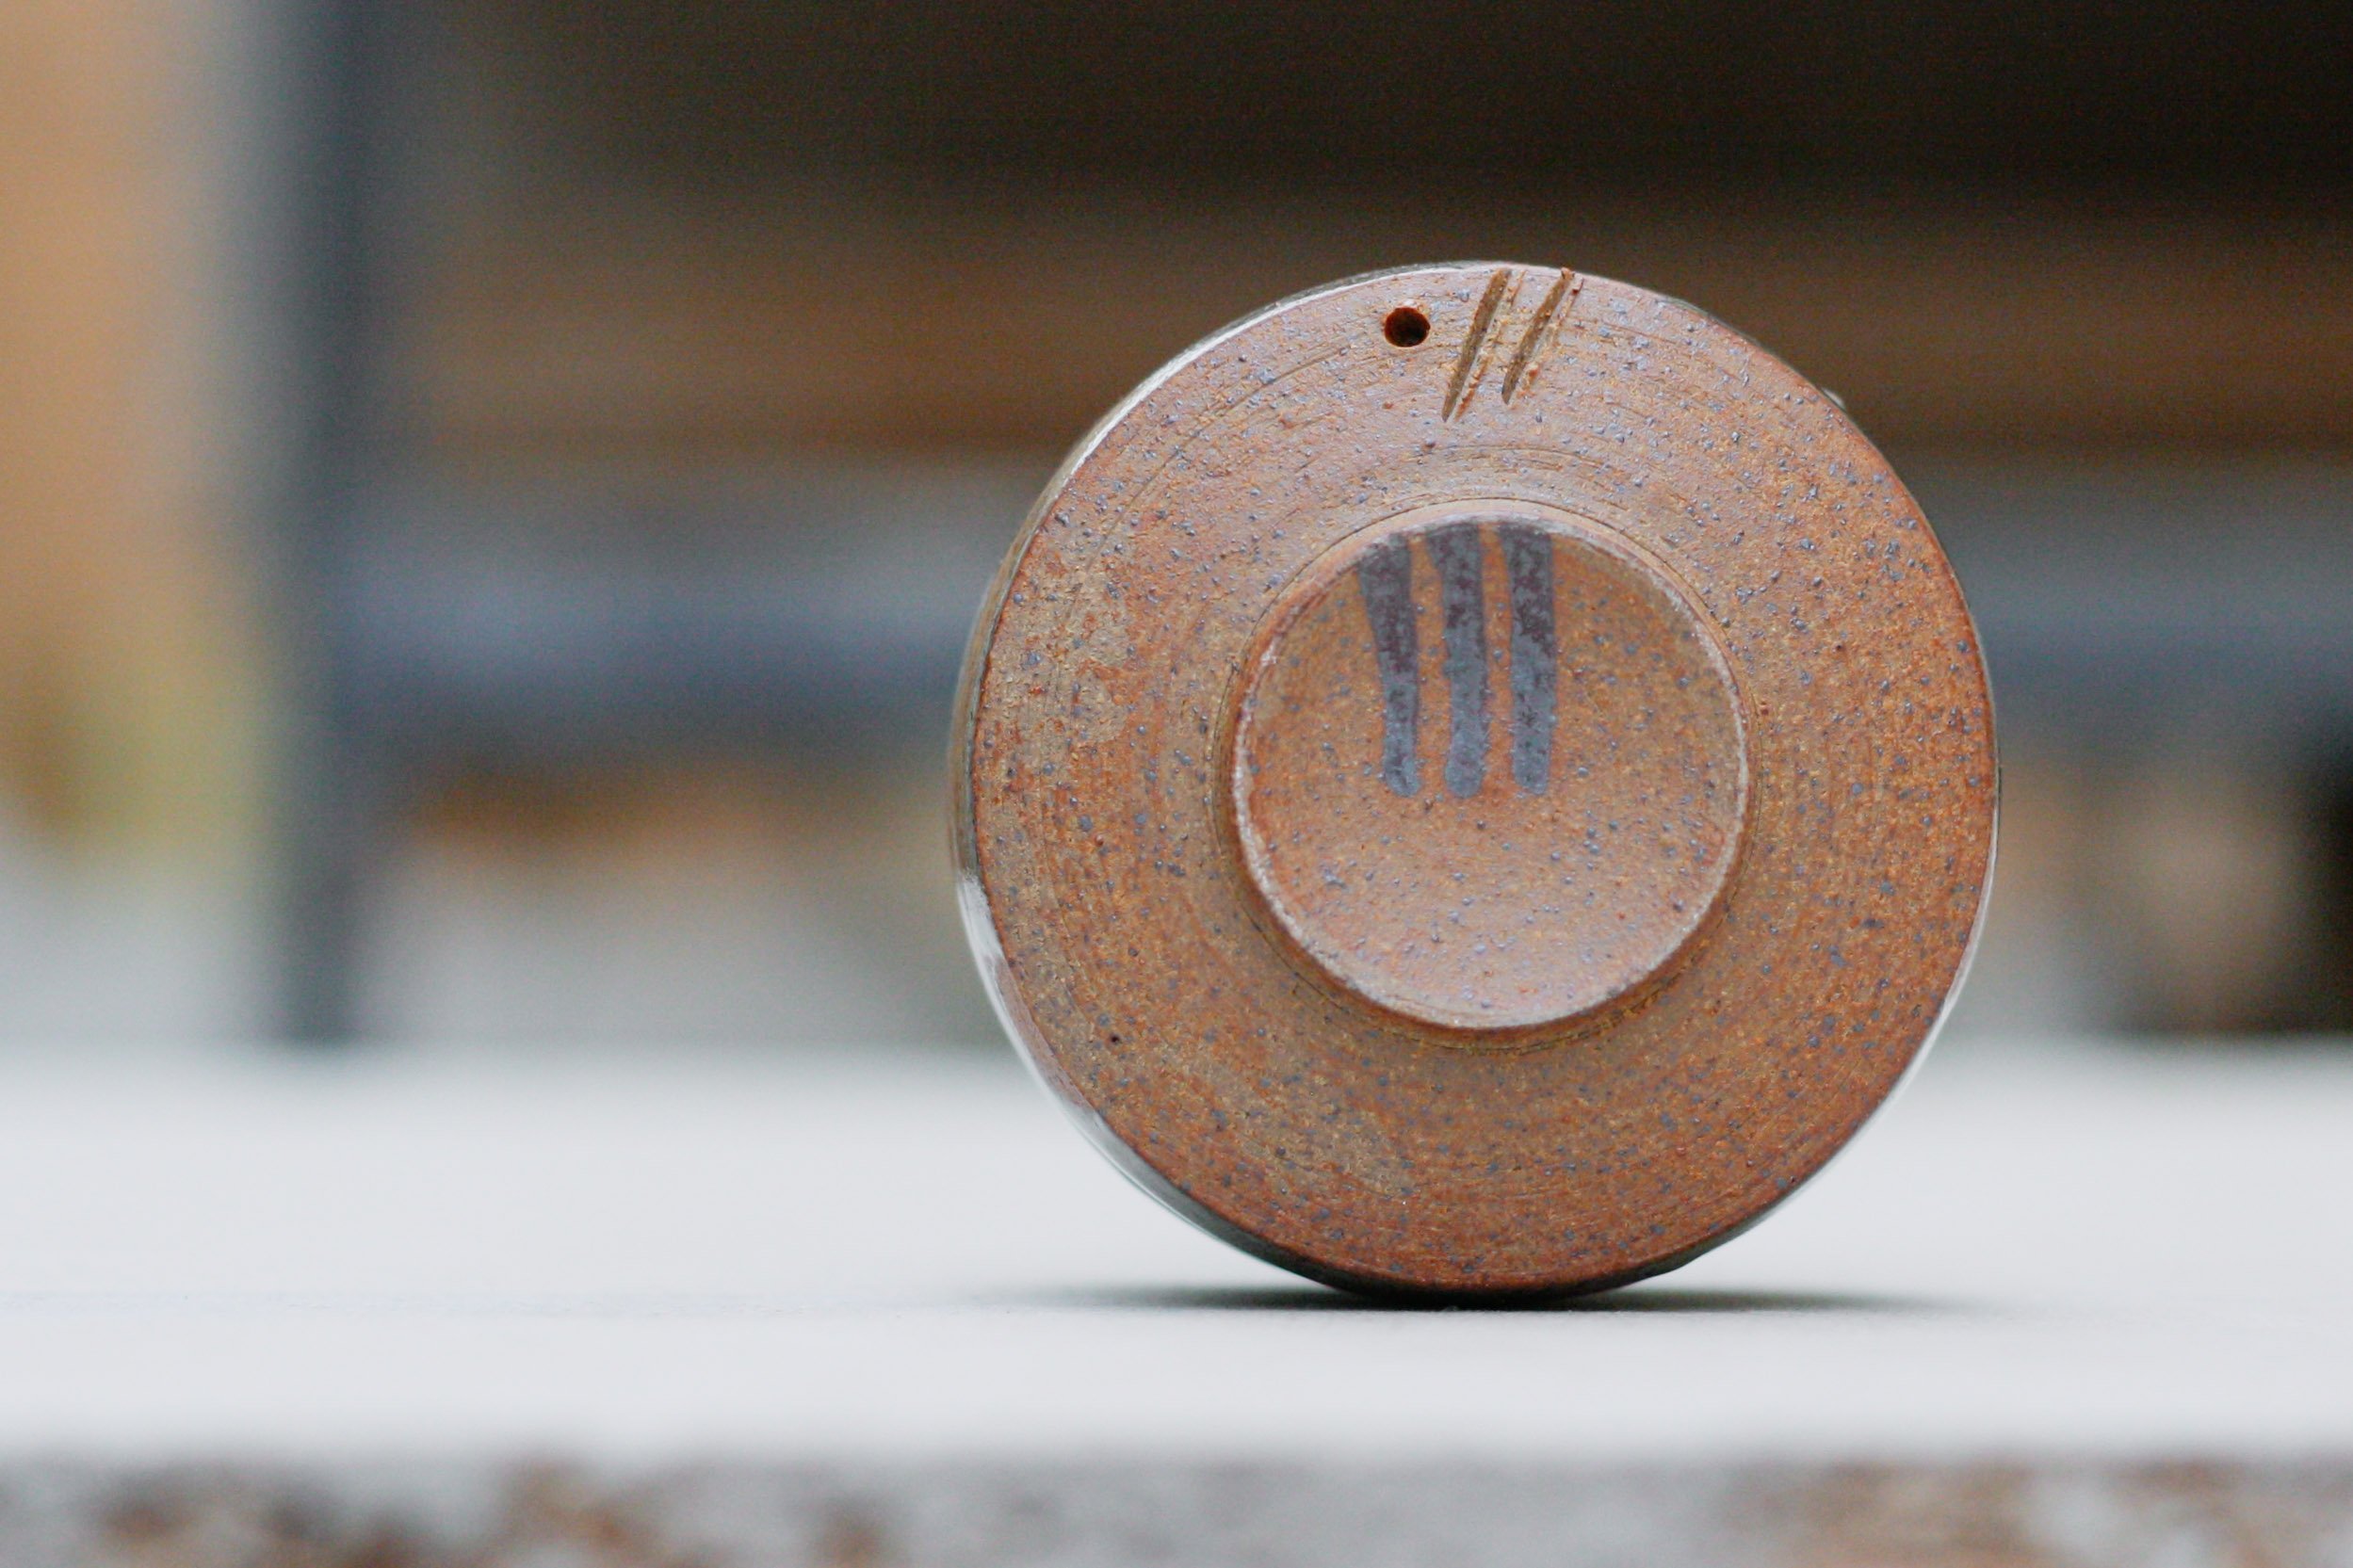
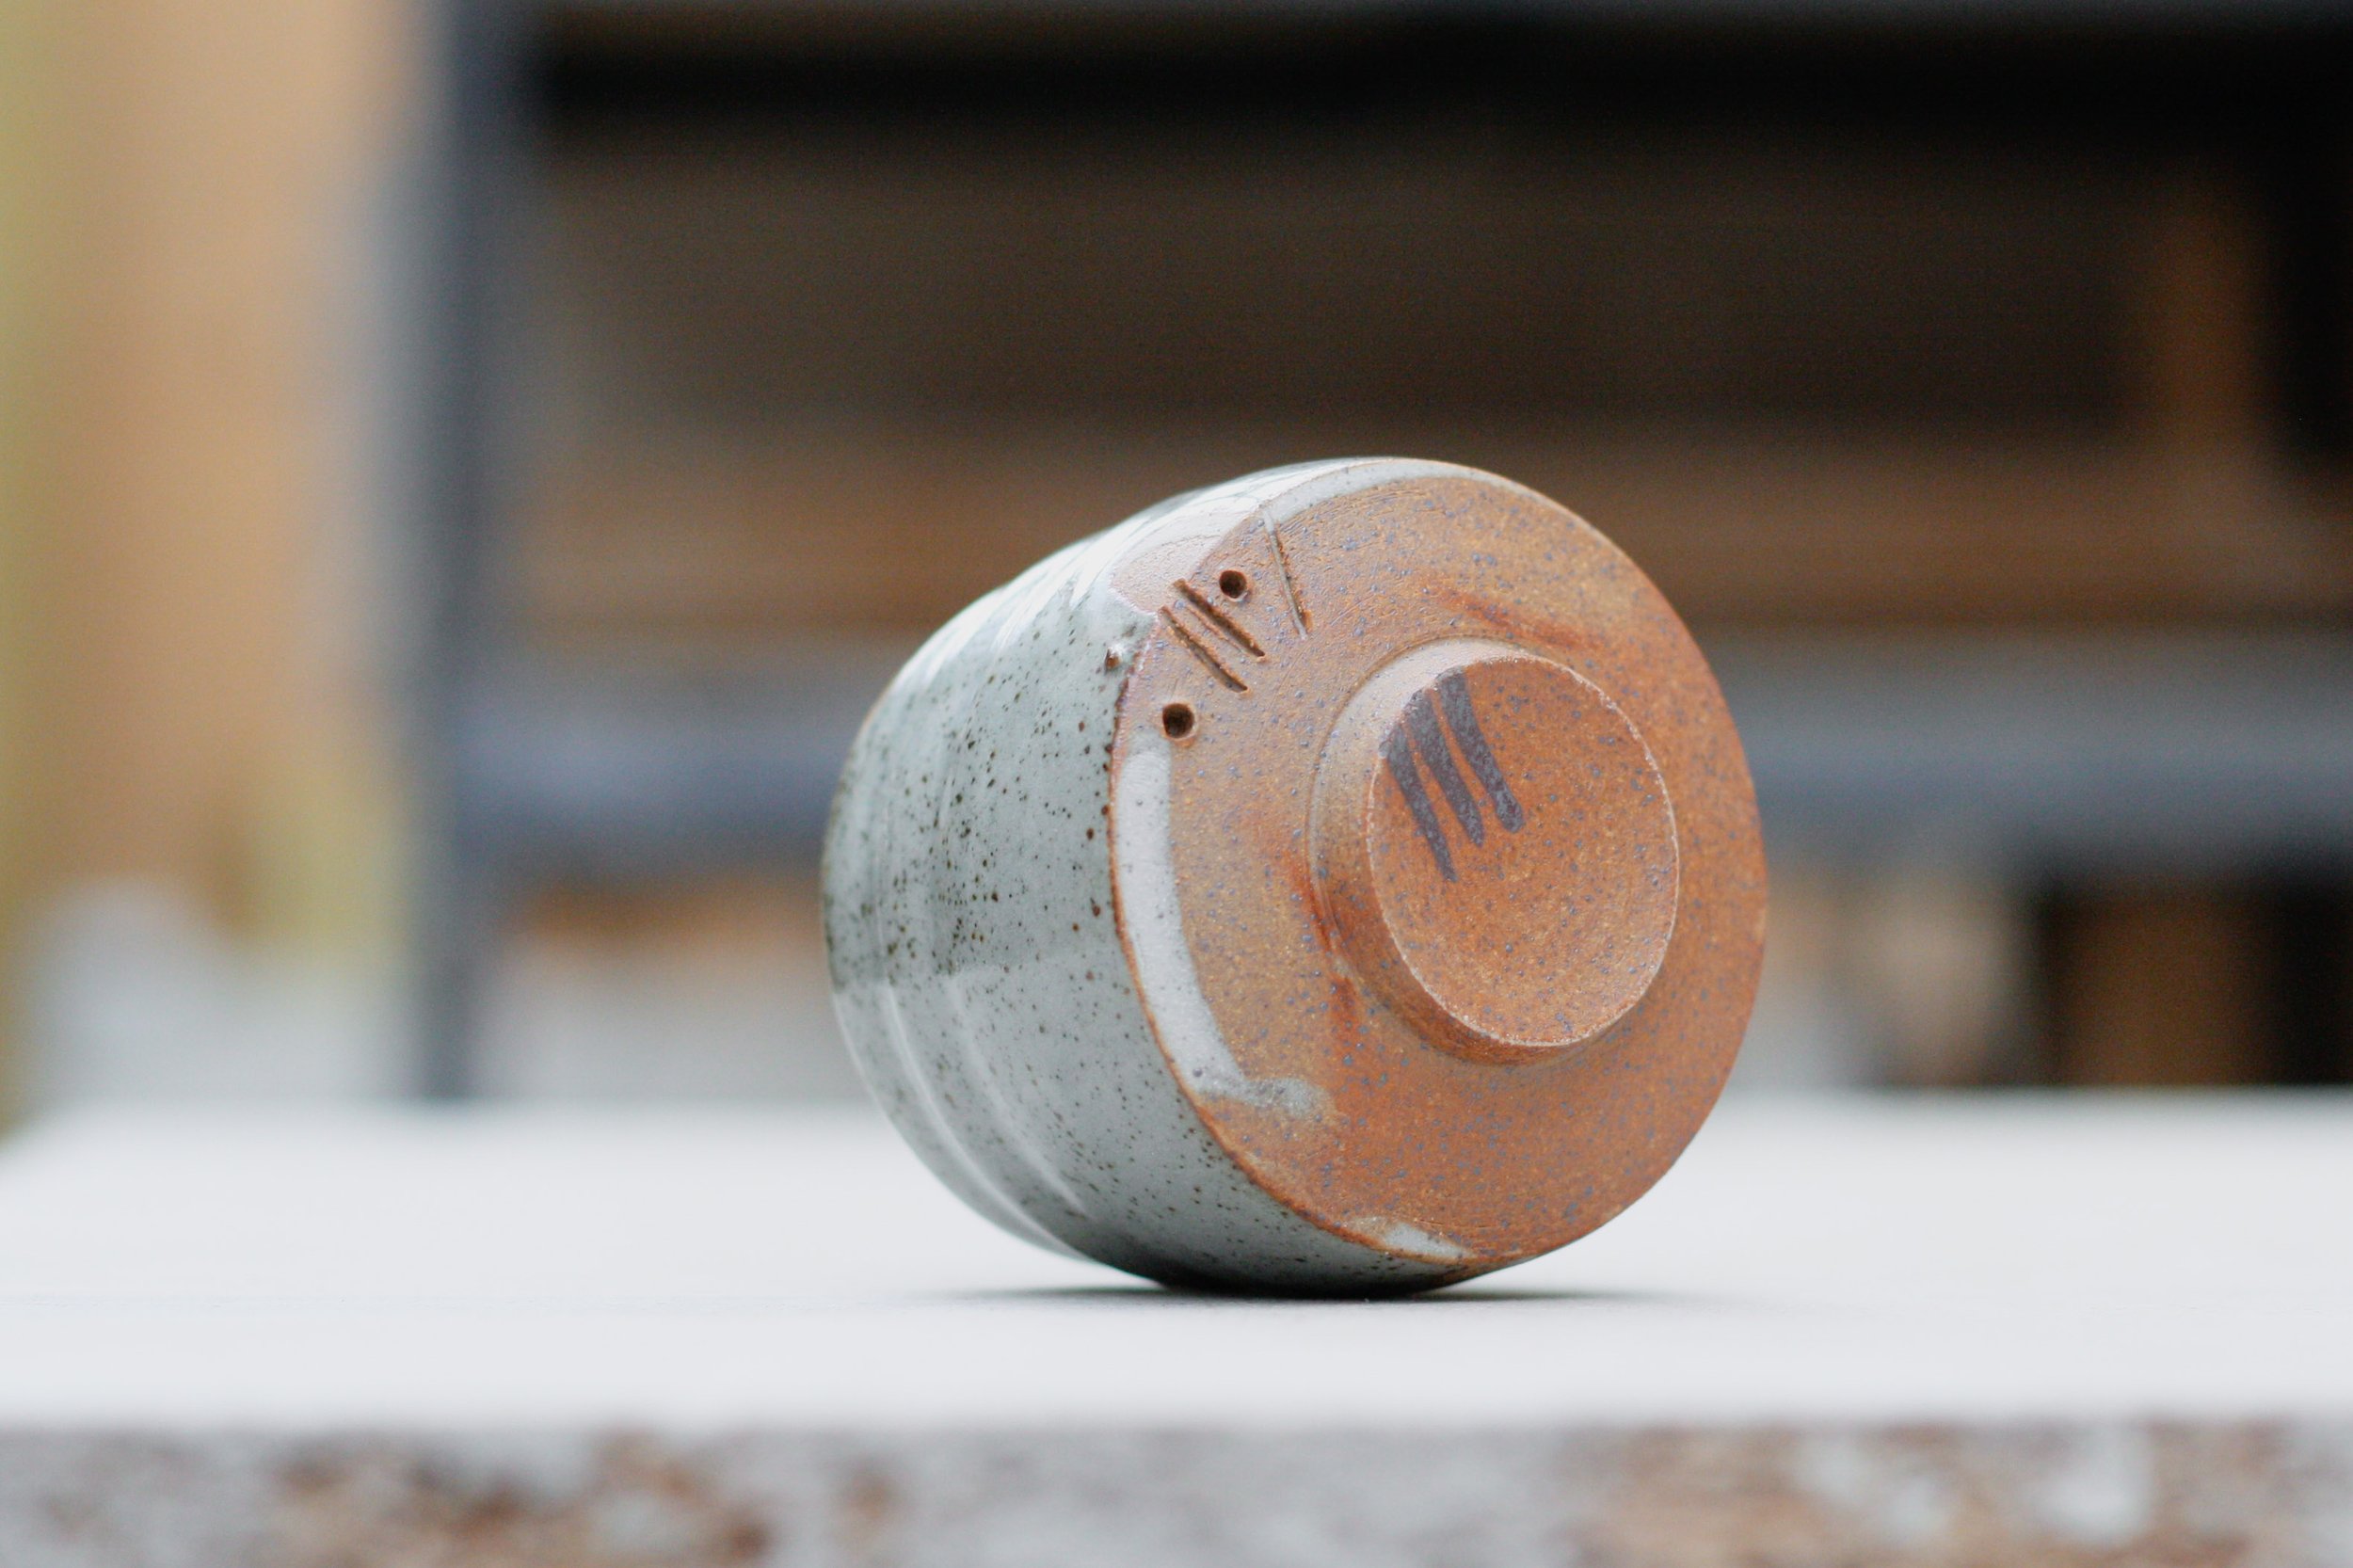
You’ll notice some markings on the underside of the tea bowls, dots and dashes in a strange looking roman numeral type system. These are markers for clay type, slip type and glaze type respectively. This way the pots can be read once they come out of the glaze firing so that I can guarantee which materials were on each piece. I sometimes write on the pots with stain or oxide after they’ve been biscuit fired, but with darker clay bodies it can be difficult to see, so I like the clarity and realiability of scratching into the clay at the greenware stage.


glazing
Once all the teabowls had been thrown, turned, slipped and biscuit fired, it was time to glaze them. Many remained unglazed as I was keen to test some matt clay and slip surfaces, but the bulk of them were poured and dipped. It’s worth noting that I applied wax resist to all the bases of the pots on the wheel, partially for neatness but also for ease: wiping glaze off the bottom of a pot is not something I enjoy, and there was lots of these little pots.
The clear glazes that I use were already mixed up in big 25 litre tubs, all to a pre determined specific gravity (a measure of thickness). As I mentioned, glaze thickness is often a really crucial element of the glazing process so getting to grips with specific gravity measurements is really worthwhile. My clear glazes will all trun opaque if applied too thickly. The other glazes (satin white, satin black and crackle) were made up in smaller 5 litre tubs. I made a very small amount of the satin black as the oxides in the recipe are extremely expensive. It’s worth noting that the bulk of my clay, slip and glaze technology is very affordable and readily available. I have avoided expensive heavy metals and any recipes with weird and wonderful ingredients in order to keep my practice affordable, dependable and wherever possible sustainable. The main heavy metal oxide I use is iron and it is extremely cheap and readily available, unlike many others which are not only very financially inaccessible but also very ethically and morally fraught.
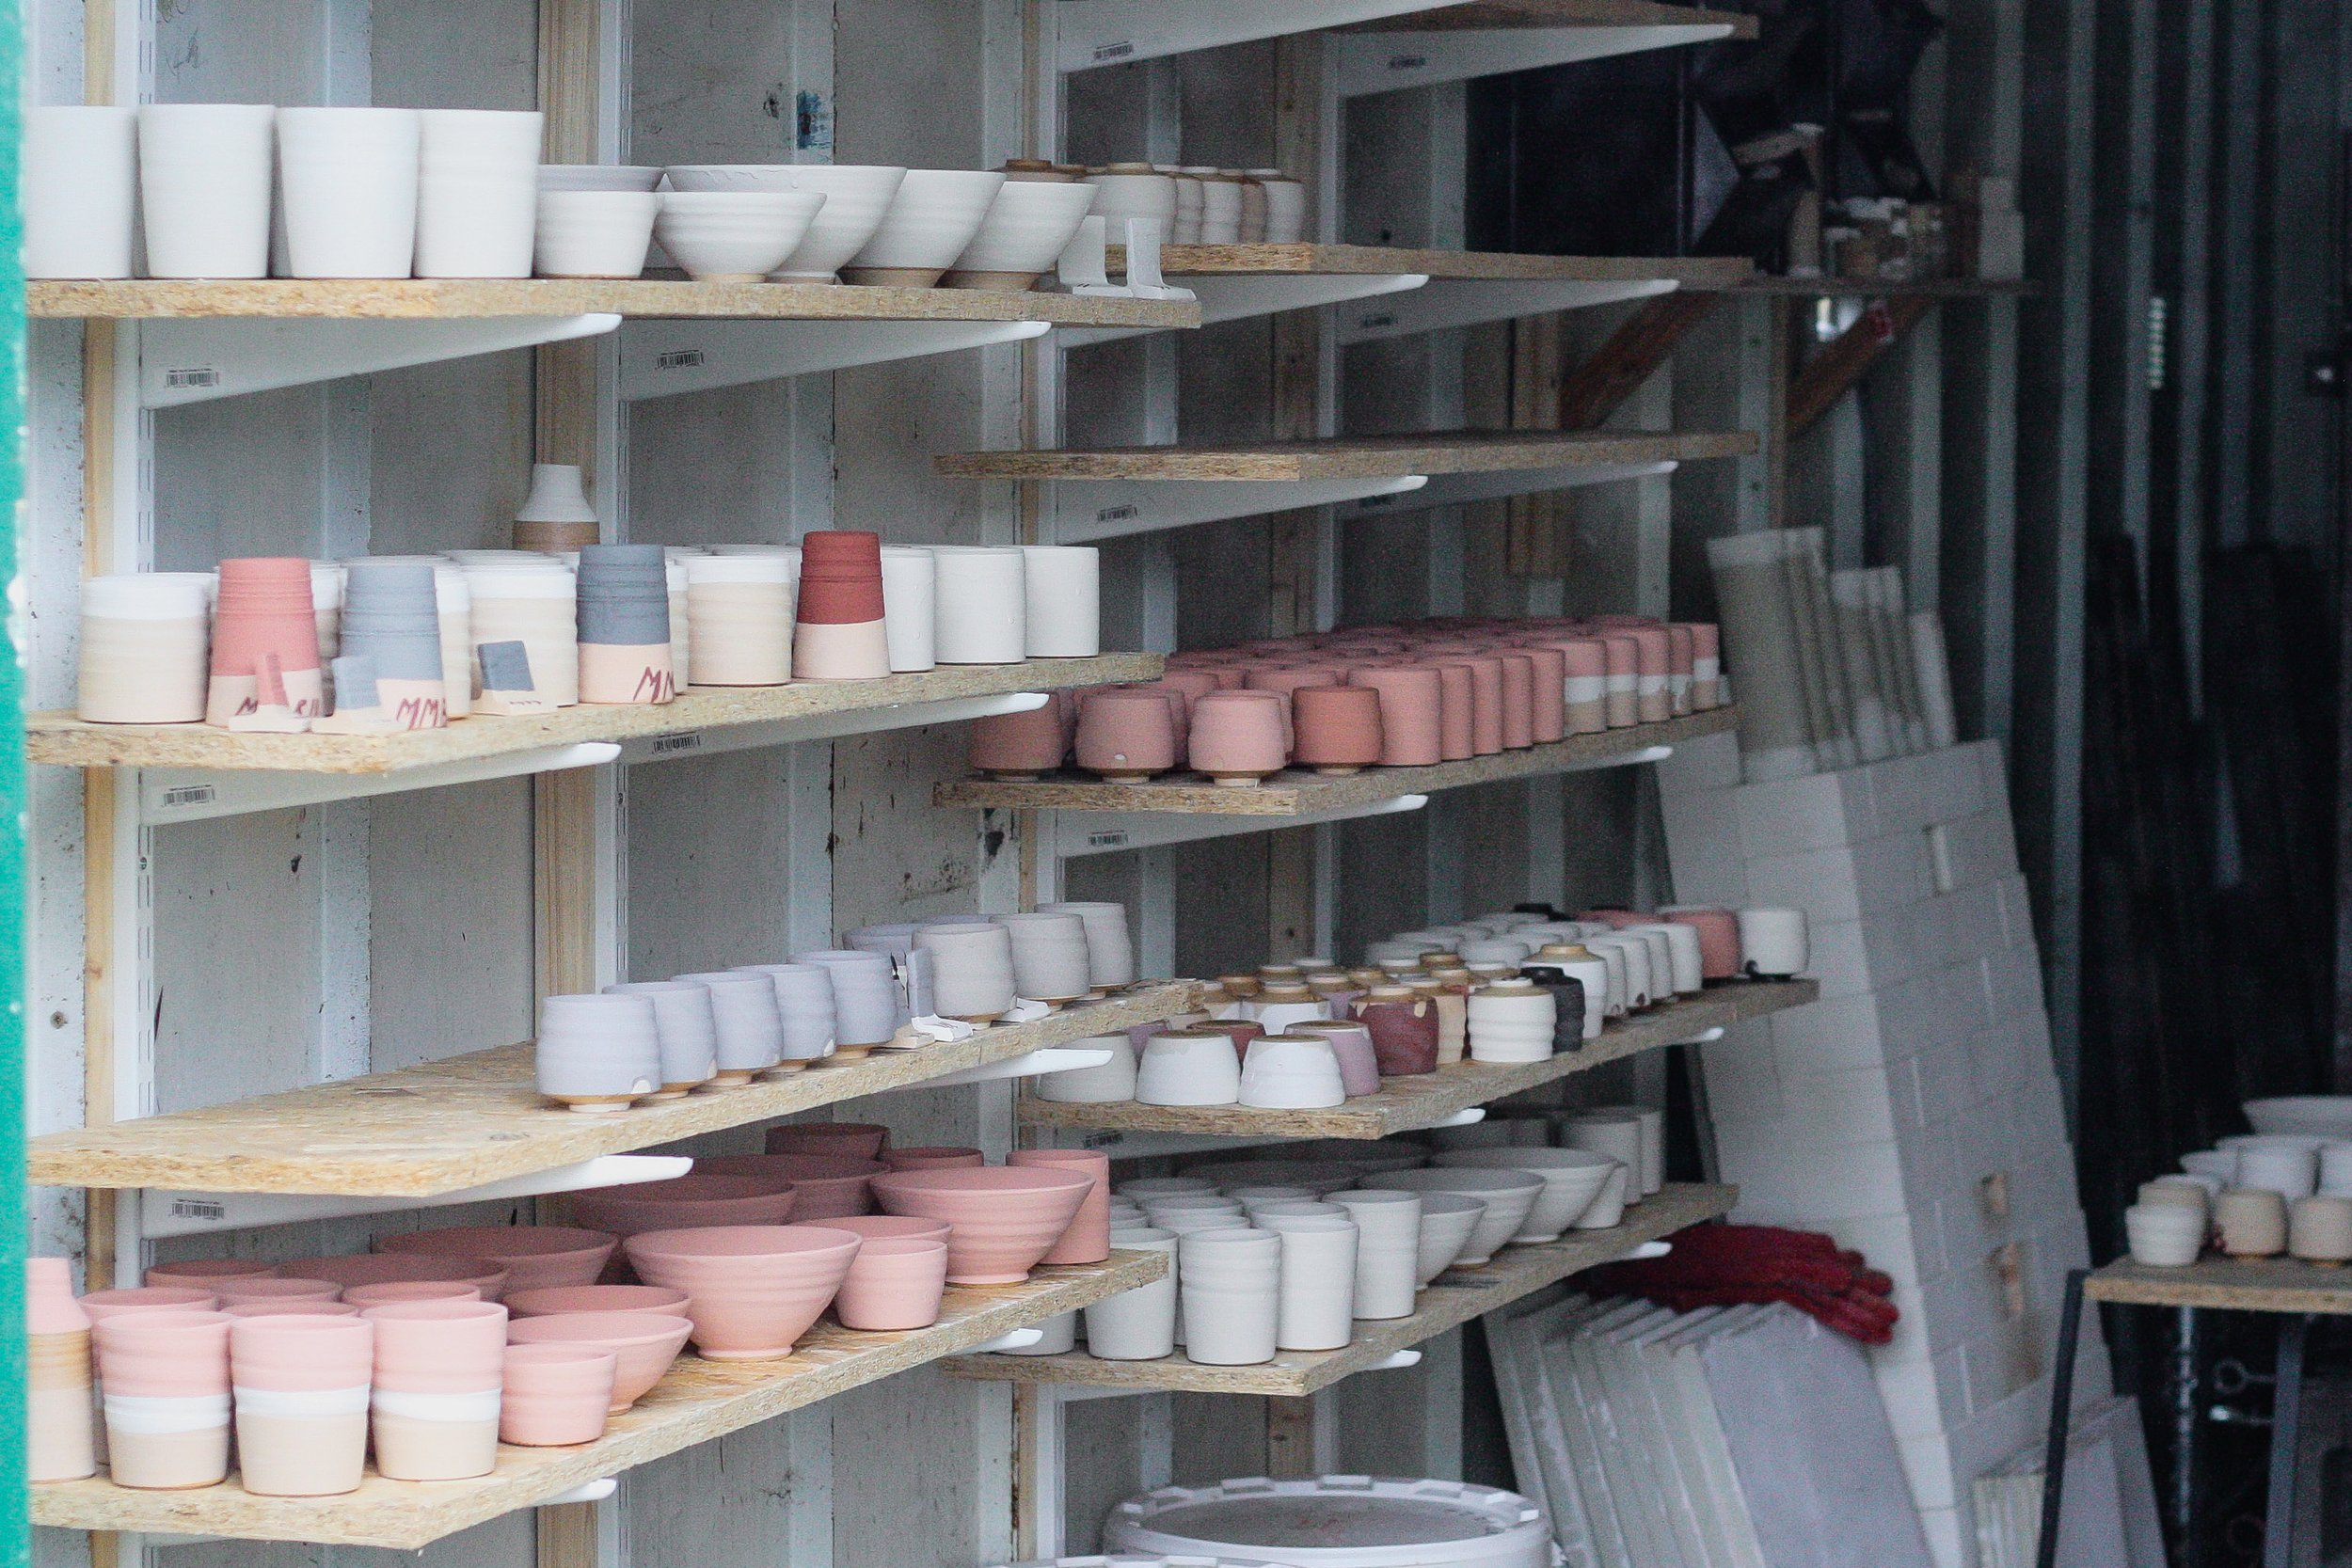
The images above were taken in my kiln shed which also functions as my glaze room. It’s a simple space with a big bench and lots of shleving. Once the work is glazed it gets collected in groups on the shelving according to where it’s going in the kiln (higher up for hotter spots - around 1300 degrees C maximum - lower down for cooler spots - around 1280 degrees C minimum. There’s lots more information and images on the kiln shed over on the kiln build page.
MY CLAYS, SLIPS & GLAZES
I’ve always been drawn to simple recipes when it comes to glazing, especially after realising how much you can do in a gas kiln with the kinds of combinations that I’ve outlined. The following details some of the specifics of my material choices:
CLAY:
Buff stoneware: anything will do! A high firing clay with some iron that will bring toasty warmth to bodies and glazes in reduction. I use Valentines V9G.
Grey stoneware: again, anything will do. A high firing clay without iron that allows for brighter, cooler finishes in reduction. I use White St Thomas, B17C or Eddie’s Body.
Black stoneware blend: the initial black clay tests I did didnt make it through the 1280 degree C temperatures on the bottom shelf of my kiln, so I’ve taken to blending it with some buff stoneware to help it deal with the heat (it’s also much more economical this way as black clay can be very pricy). I use 2 parts buff stoneware to 1 part black clay. Any commercially made black stoneware is fine.
SLIP:
White slip: as simple as it gets. Equal parts china clay and ball clay.
Iron slip: equal parts china clay and ball clay plus 20% iron. Varying the type of iron can have different effects and is a lovely thing to explore.
Black stain slip: equal parts china clay and ball clay plus 10% black stain.
Black oxide slip: equal parts china clay and ball clay plus 10% manganese, 3% cobalt and 13% iron oxide.
GLAZE:

THE RESULTS…
While testing glazes en masse can be a laborious and sometimes slightly daunting task, I’ve found it to be really rewarding and satisfying. While a test here and there is always a great way to slowly get to grips with new recipes and processes, big batches of tests can massively accelerate your material technology development and provide lots and lots of new information in a focussed and time efficient way.
Below are a few more images of the glaze fired and finished tea bowls. The select 20 that make up the library sit on some specially made shelves above my glaze table so that they’re always ready to hand for points of reference. I’m massively pleased with how the project turned out and frankly I cant wait to do it all over again with some new glazes. Next time around it will all be about satin and matte glaze surfaces and some more reactive and fluid finishes that bring their own life and movement to the surface of a vessel.
Thanks for reading and dont forget to get in touch with any questions on the say hello page. Sign up to my mailing list to stay up to date with all the lastest information about my pots, practice and points of sale.